8 Places a Ford Capri Always Rusts (And How to Check Them)
A Ford Capri specialist shows you the eight spots where rust always hides. Photos from real restorations. Use this checklist before you buy.

Ford Capri rust is the single biggest reason classic Capri buyers lose money. Every Mk1, Mk2 and Mk3 I’ve ever cut into has been rustier than it looked from outside — and after twenty-plus years of welding and fabrication work on classic Fords at my workshop near Milton Keynes, I can tell you the eight spots where it always hides. Print this list, take it with you, and check every one before you write a cheque. The cost data and screwdriver-test instructions for each spot are below.
Why Capris Rust the Way They Do
Ford in the 1970s and 80s built bodies fast and cheaply. Rust-proofing wasn’t a priority — most Capris left the factory with a quick dip in primer, a coat of paint, and a bit of underseal. Capri designers loved double-skinned panels (rear arches, sills, scuttle, boot floor lip) which trap water between the layers where you can’t get at them. Salt-belt winters did the rest. By the time a Capri was ten years old, the rot had usually started somewhere hidden. By forty years old, most have had at least one round of repairs, and a fair few have had repairs that were worse than the rust.
That’s the context. Now here’s where to look. If you’re cross-referencing this against a generation-specific buyer’s guide, my Ford Capri Mk1 buyer’s guide covers values and variants alongside the rust patterns specific to the first-generation cars.
The 8 Spots, Ranked by How Bad They Get
1. Sills (inner, outer, and the box section between)
Sills are the single most expensive thing to get wrong on a Capri. They’re structural — they tie the front and rear of the car together — and they’re made of three layers: outer skin, inner skin, and a closing box section between. The outer is what you see. The inner and the box are where the rust hides.
- At one metre — Bubbling or stepped paint along the bottom edge of the door opening. Cosmetic outer-sill bodges are common, so look for inconsistent paint texture too.
- Under the car with a torch — Look up at the inner sill from underneath. If you can see daylight, holes, or flaky brown metal, the box section behind is gone as well.
- Screwdriver test — Push a small screwdriver into any suspicious area. Sound steel resists. Rusted sill metal will dent or pop straight through.
If it’s gone here: proper sill repair, both sides, with new outer, inner, and box section is £2,500–£4,500 in fabrication work alone, before paint.
2. Floor pans (front, rear, including seat mounts)
Floors corrode where water gets in — leaking door seals, leaking windscreen seals, condensation, and salt brought in on shoes. The hot spots are the footwells (where they meet the sills and bulkhead), the area under the seats (where seatbelt mounts and seat rails bolt down), and the rear seat pan where it meets the inner arches.
- At one metre — Lift the carpet if the seller allows it. Look for damp patches, soaked underlay, or visible patching from below.
- Under the car with a torch — Look up at the floor pan. Heavy underseal that’s been freshly sprayed is a red flag — it usually hides patches or rust.
- Screwdriver test — Push down hard on the floor with your hand or thumb. A sound floor doesn’t move. A rotten one crackles, gives, or flexes.
If it’s gone here: half-floor pans are £400–£600 each side in metal, plus labour. Full floor replacement plus seat mount repair is £1,500–£3,000.
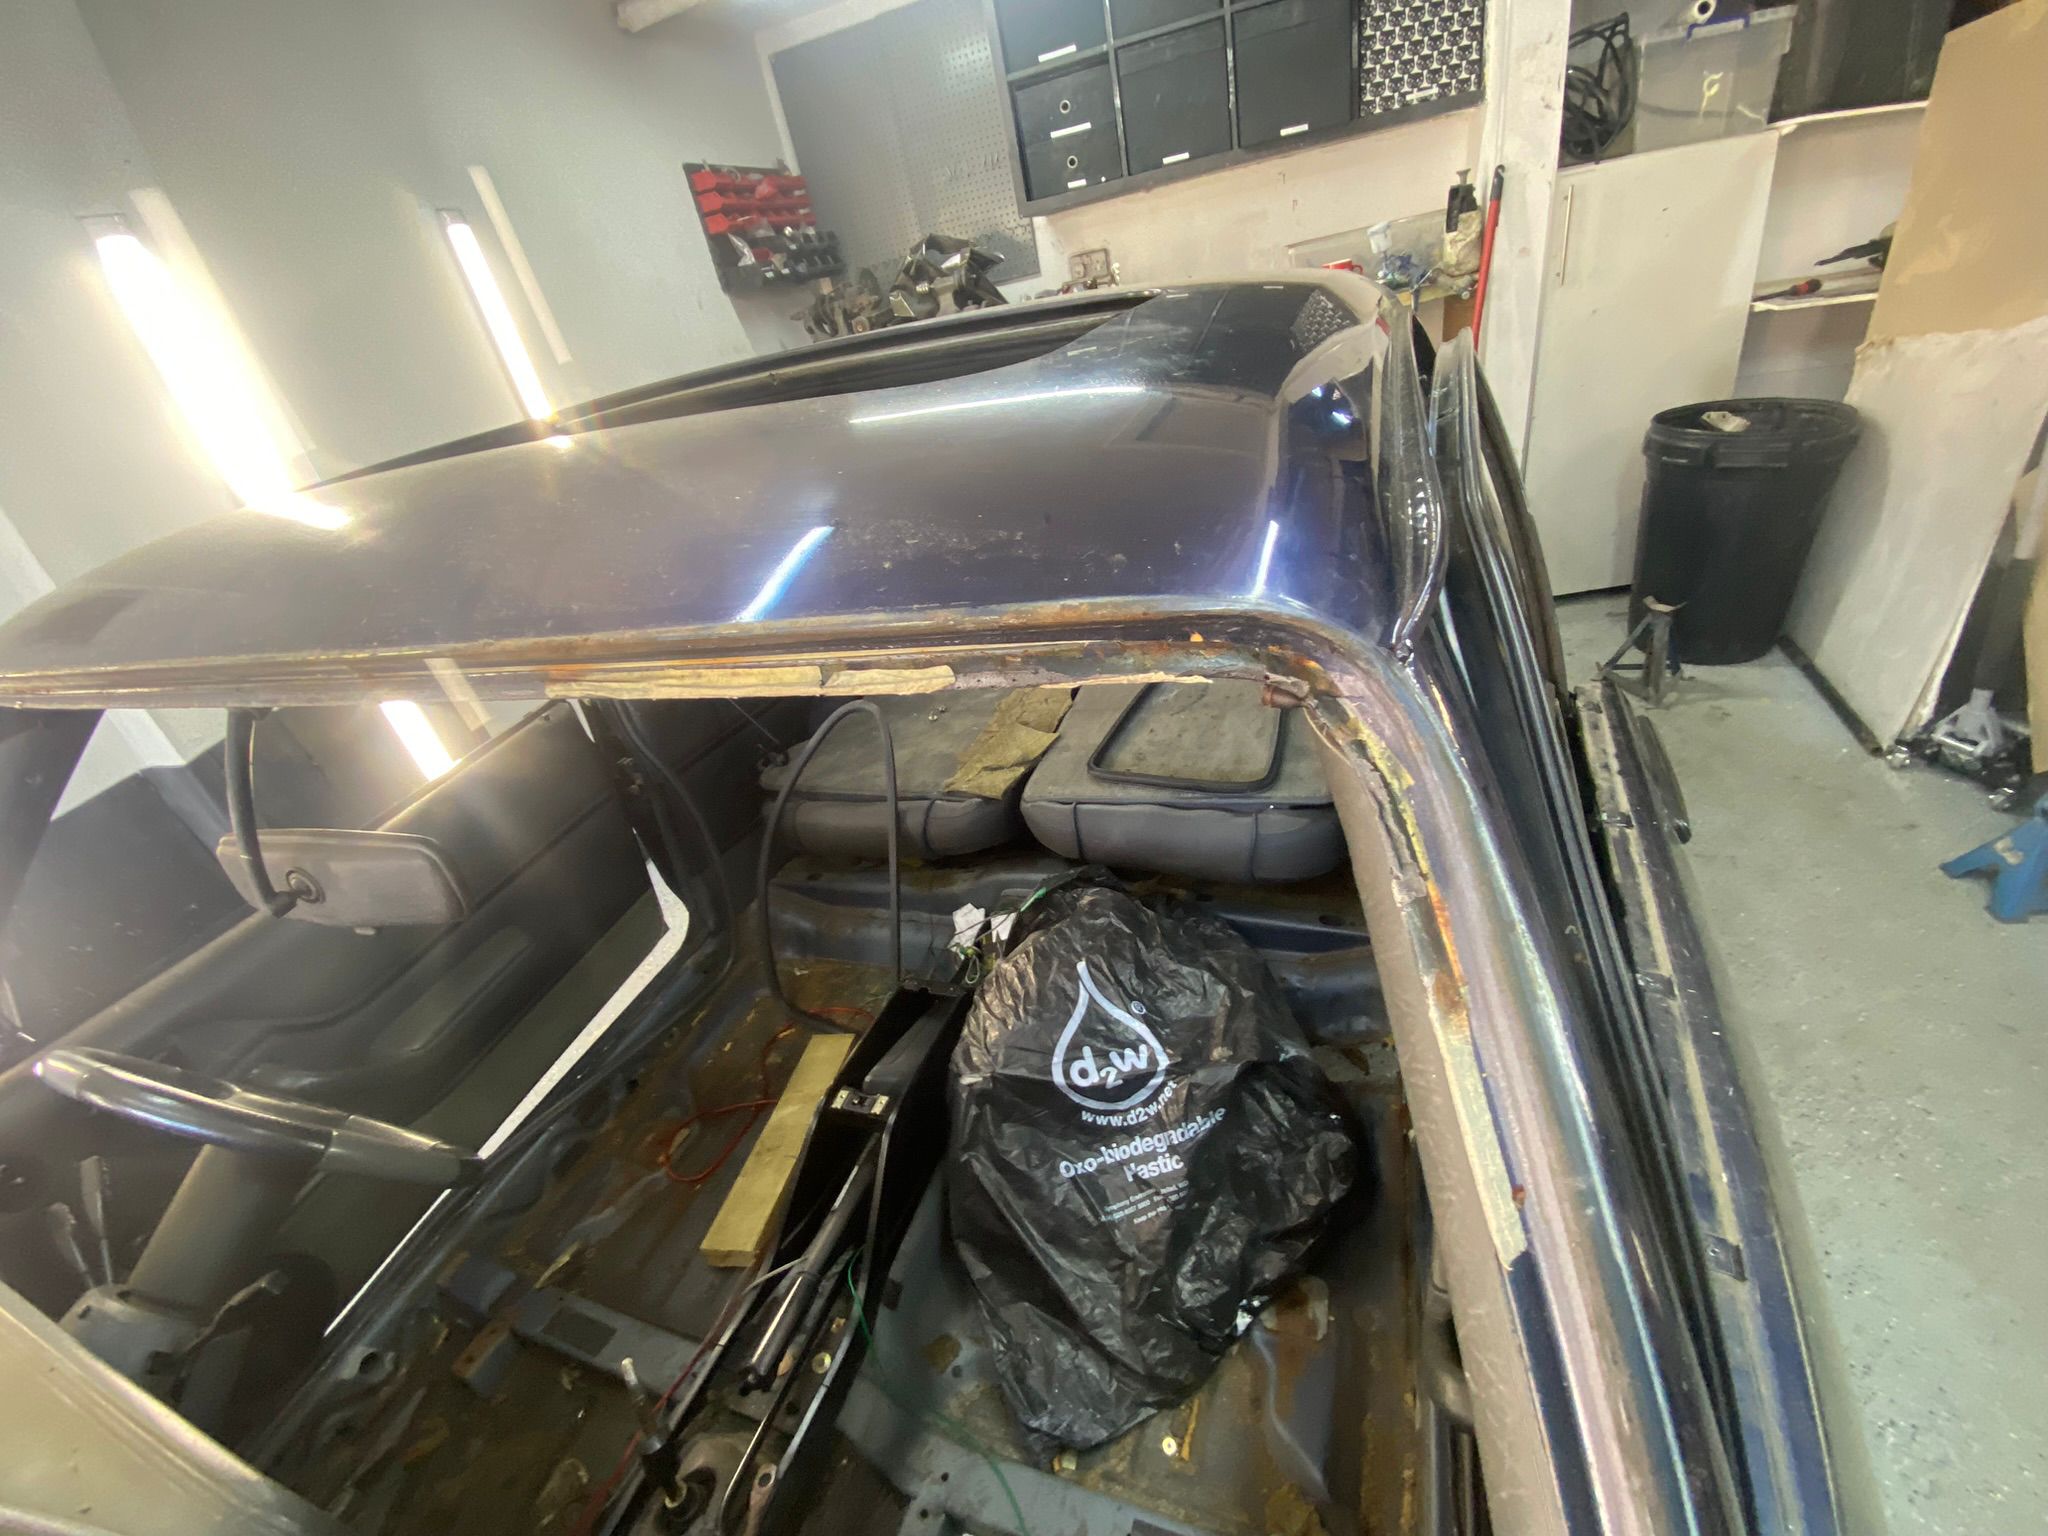
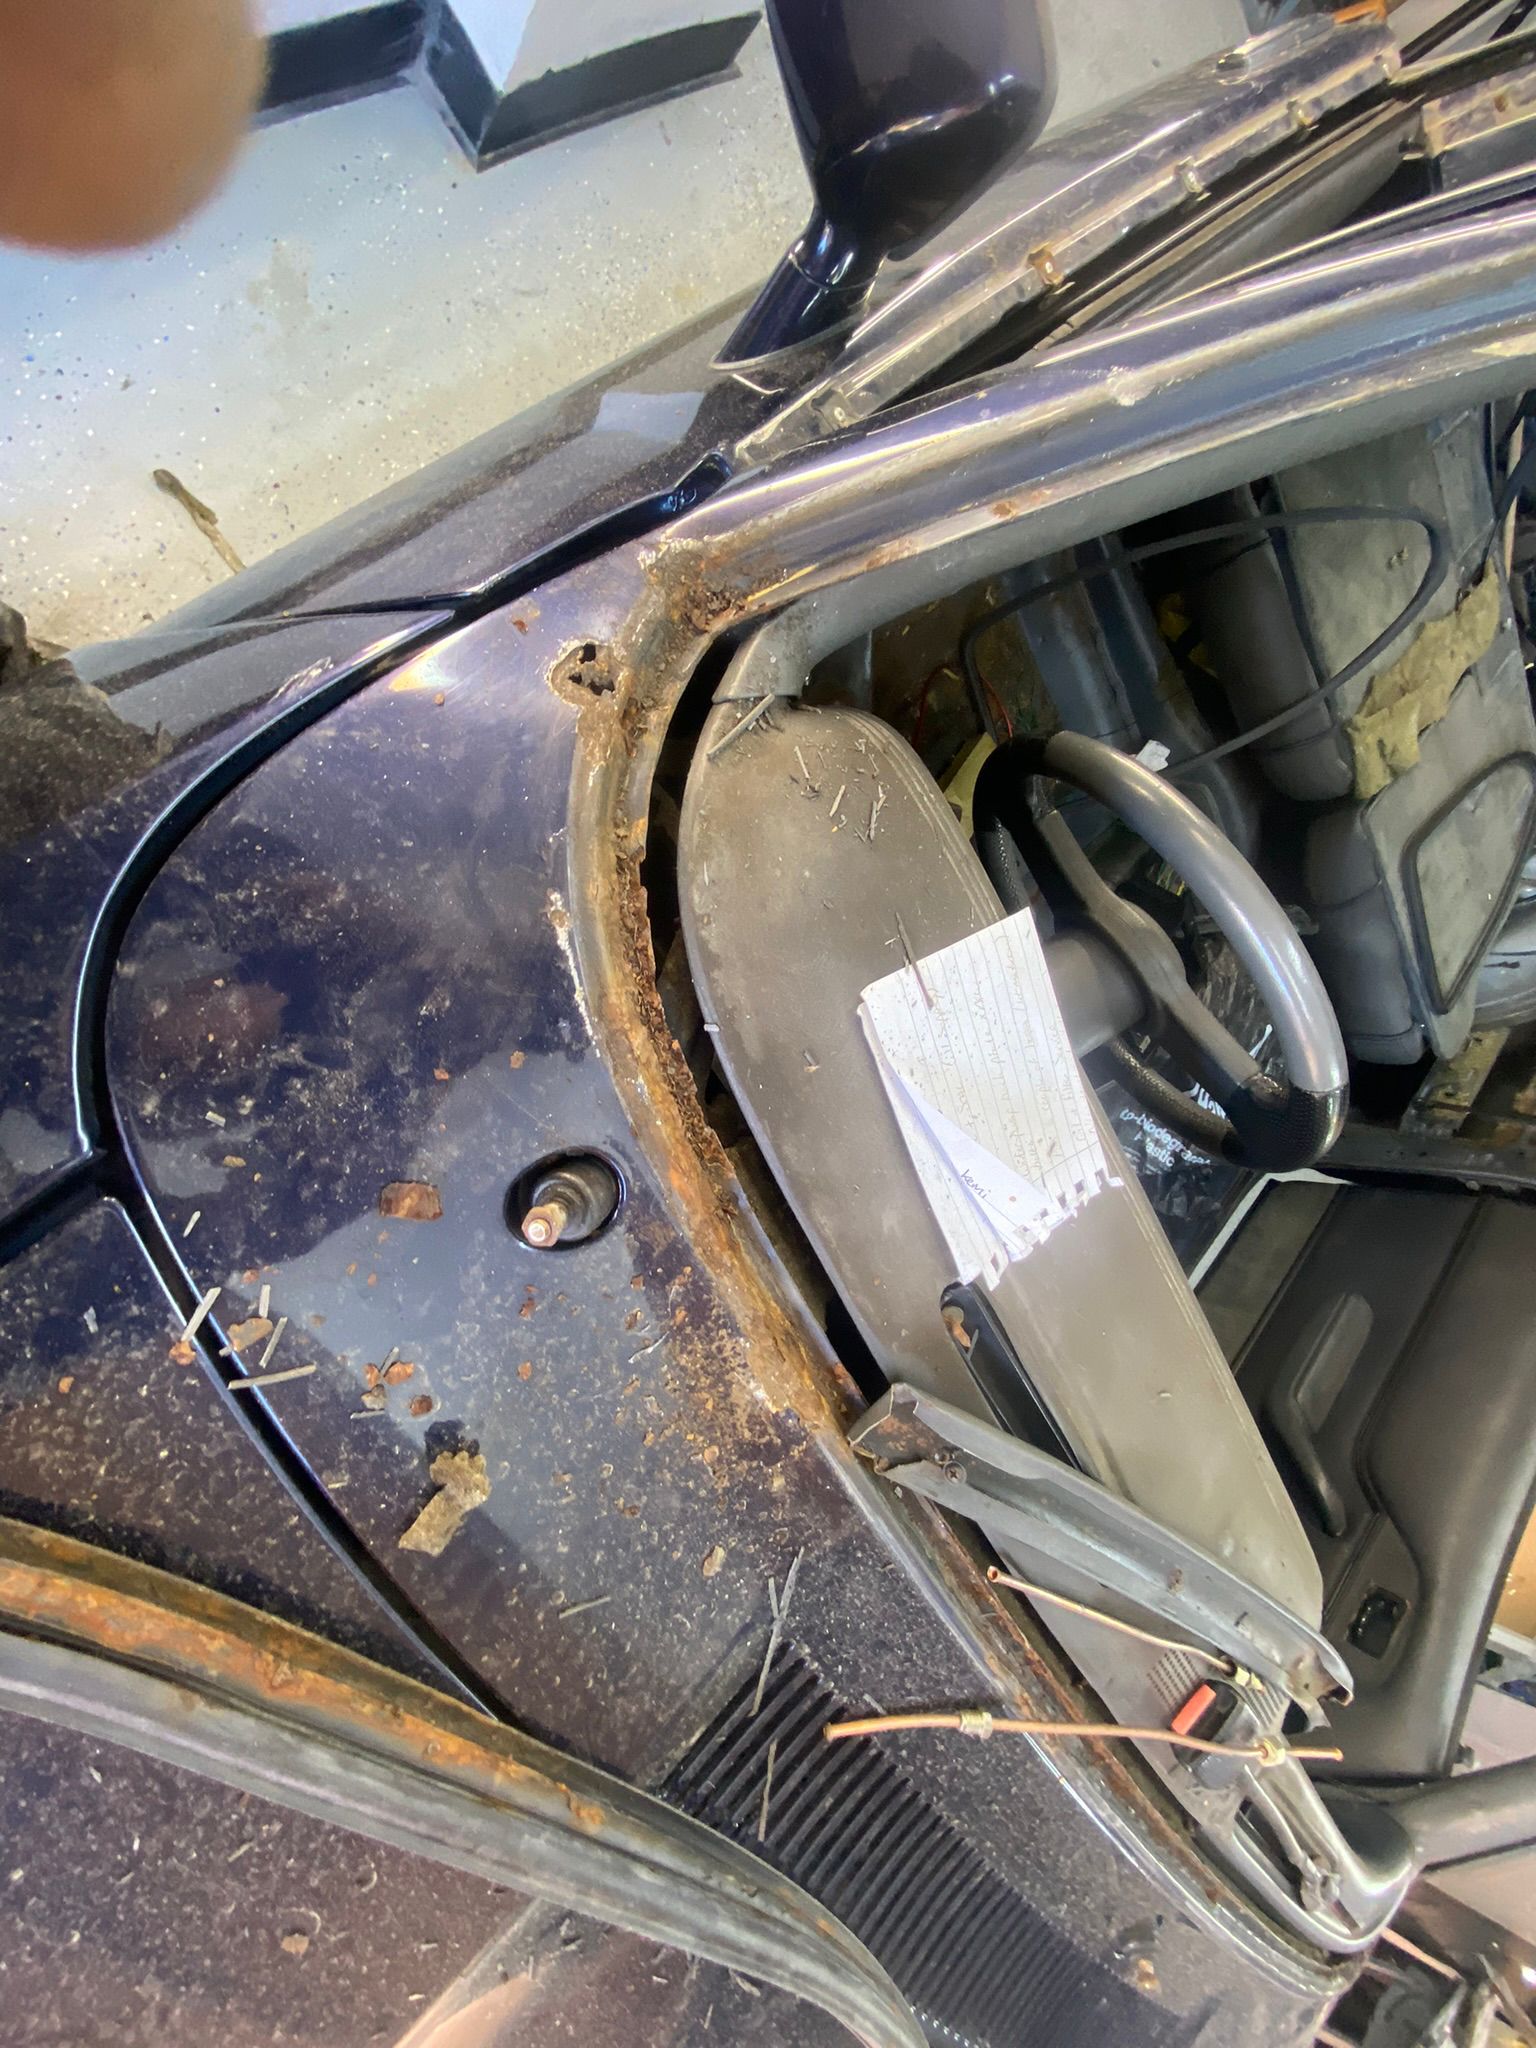
3. Scuttle panel and bulkhead corners
The scuttle is the panel beneath the windscreen wiper arms. Water sits in the channel, the windscreen seal perishes, and the metal rots from the top down. The corners — where the scuttle meets the A-posts — are particularly nasty because rust there compromises the windscreen frame.
- At one metre — Brown staining around the bottom edge of the windscreen rubber. Paint bubbles at the corners where the bonnet meets the wing.
- Under the bonnet with a torch — Look at the bulkhead from the engine bay side. Flaking paint or crusty seams indicate rot from inside.
- Screwdriver test — Carefully poke the painted scuttle. If paint cracks and flakes off in sheets, there’s rust under it.
If it’s gone here: the windscreen has to come out. £1,500–£3,500 for proper repair including glass refit and new seal. Don’t trust a quick fix on this one — water will be back in six months.
4. Rear wheel arches (inner and outer)
Capri arches are double-skinned. Mud builds up between the inner and outer skins, holds water, and rust grows outward from where you can’t see it. Outer arches show bubbles at the lip first; by the time you can see them, the inner skin behind has usually gone as well.
- At one metre — Bubbling or blistered paint at the bottom and lip of the arch. Step in the panel where filler has been smoothed over old damage.
- Under the car with a torch — Look up inside the wheel-well. The inner arch should be a continuous, solid panel. Crusty edges, jagged holes, or patches that are clearly home-welded are bad news.
- Screwdriver test — Tap behind the outer arch from inside the wheel-well. A live panel rings. A dead one thuds or shatters.
If it’s gone here: repair sections are available but fitting both sides properly is £1,500–£3,000. Doing the inners as well doubles that. This is the single most common Ford Capri rust money pit.
5. A-posts and door bottoms
The A-post is the vertical bit of structure that carries the door hinges, the windscreen frame, and a lot of the body’s stiffness. Water tracks down inside from the scuttle and rots the bottom corner. Door bottoms rust from inside out because the drain holes in the door skin block up with road grime.
- At one metre — Open the door and look at the bottom corner where the A-post meets the sill. Bubbles, filler, or fresh paint patches here are warnings. Run a finger along the lower edge of the door skin — feels sound or feels lacy?
- Under the car with a torch — Look up at the A-post base from underneath. Should be clean, painted metal. Should not flake when prodded.
- Screwdriver test — Carefully press the inside lower edge of the door skin. Brittle, crackling metal means thin steel.
If it’s gone here: A-post repairs are fiddly because of the angles. £600–£1,200 per side properly done. Door bottoms can be patched with repair sections at £300–£500 per door, but a badly rotten door is often cheaper to swap than to save.
6. Boot floor and spare wheel well
The spare wheel well sits in a low part of the boot floor. Water collects there from leaking tail-light seals, perished boot rubbers, and condensation. The well is a Capri trademark for going through. Once the well’s gone, the rot spreads outward into the boot floor proper and then forward into the rear seat pan.
- At one metre — Lift the boot carpet and the spare wheel. Look for damp, brown staining, or visible holes in the well.
- Under the car with a torch — Look up at the boot floor from below. Fresh underseal is suspect. Old paint over rust will be flaking.
- Screwdriver test — Push down on the boot floor and the spare-well base. Soft, flexing, or crackly metal is gone.
If it’s gone here: a spare wheel well replacement panel is £80–£120 in steel, £400–£800 to fit properly. Full boot floor and rear seat pan together is £1,500–£3,000.
7. Chassis rails (front and rear)
Front rails run from the front bulkhead forward to the radiator support and carry the front suspension turrets and the engine mounts. Rear rails locate the leaf-spring hangers and the rear axle. These are the things keeping the car together. Rot here is structural and dangerous.
- At one metre — Look at the underside of the car (jack it up if you can, otherwise lie down). The rails should be straight, painted, and rust-free.
- Under the car with a torch — Look closely at the join between rail and floor pan, and at the spring hangers. Rust here often hides under fresh paint or underseal.
- Screwdriver test — Tap along the rails with a screwdriver handle. Sound rails ring solidly. Dead rails thud or echo hollow.
If it’s gone here: chassis rail repair sections are available but properly fitting them is serious work — £1,000–£2,500 per rail. Both rails plus spring hangers is well into four figures.
8. Fuel filler neck and rear valance
The fuel filler neck passes through the rear quarter panel. Water gets behind the filler-cap surround and rots the metal around it. The rear valance — the panel below the boot, between the rear lights — collects road spray and rots from underneath. Both look cosmetic but valance rust often spreads into the boot floor, and filler-neck rust spreads into the rear quarter, which is more serious.
- At one metre — Open the filler cap and look at the metal around the neck. Brown staining, paint bubbles, or a crusty surround means rot.
- Under the car with a torch — Look at the back of the rear valance from beneath. Should be solid. Holes, scabs, or patches that aren’t OEM are warnings.
- Screwdriver test — Tap the rear valance. Sound steel rings. Filler thuds.
If it’s gone here: rear valance replacement is £400–£800 in fabrication. Filler neck repair properly done can pull in nearby quarter-panel work and end up £800–£1,500.
The Hidden Ones Nobody Checks
Those eight are the ones you can spot if you know what you’re looking at. These are the ones I find when I’m halfway through a job and the customer thought they were buying a sound car. Don’t skip them.
- Headlamp bowls — On Mk1 cars with quad round headlamps (GXL, RS2600, RS3100, and US-spec sealed-beam cars), the bowls themselves rust through. Take a headlamp out and look behind it. Standard Mk1 GT cars use single round headlamps and don’t have the same issue.
- Heater box — Sits under the scuttle, collects scuttle drain water. Look up under the dash with a torch. Crusty heater box means scuttle rust has already started.
- Jacking points — The pressed-in points where a factory jack would have gone. They tear out when the metal goes thin. A clean Capri has solid jacking points; a tired one has them hanging off.
- Seatbelt mounts — Front and rear belt mounts bolt into the inner sill or floor pan. If the surrounding metal is rotten, the belt won’t hold in a crash. This is an MOT failure and a safety issue.
- Inner wings (engine bay) — Under the bonnet, look at the inner wing tops where the suspension turret meets the bulkhead and where the battery sits. Battery acid kills metal fast. Suspension turret rot is structural.
Why Filler Is Worse Than Ford Capri Rust
Rust you can see is a known problem. Filler hiding rust is a problem with a price tag attached. Four quick checks before you commit:
- Magnet — Run a small fridge magnet along sills, arches, lower doors, rear valance. If it doesn’t stick or pulls away easily, there’s filler underneath.
- Paint thickness gauge — £30 online. Factory paint reads 100–150 microns. Over 300 is suspicious. Over 500 is definitely filler.
- Low-angle light — Look down the panel with the sun (or a torch) at a low angle. Wavy reflections, dips, and bumps that vanish head-on become obvious.
- Tap test — Knuckle or screwdriver handle against the panel. Listen. Sound metal rings clear. Filler thuds dull. Once you know the difference, you won’t forget it.
What a “Rust-Free” Capri Actually Looks Like
Let me manage expectations. There is no such thing as a truly rust-free survivor Capri. Anything 40+ years old has had some rot somewhere. What you can find is a well-repaired Capri — one where any rust has been cut out properly, replaced with new steel, and protected so it won’t come straight back. Or a not-yet-repaired Capri where the rust is honest and visible and the seller isn’t pretending it’s something it isn’t.
Both are valid buys. What you don’t want is a Capri where the rust has been hidden under filler, fresh paint, or fresh underseal to get it sold. That’s the car that empties bank accounts six months down the line. Same advice applies to buying any classic Ford project car — see the rust before you pay, or accept that you might not.
How Much Does Ford Capri Rust Repair Cost?
I’ve put rough numbers next to each spot above. The big picture: a Capri with one or two trouble spots (one arch, one floor patch) might be £2,000–£4,000 in bodywork to put right. A Capri with most of the eight above plus paint is £8,000–£15,000. A bare-shell Capri rebuild — like the Brooklands restoration I did — is £12,000–£20,000+ for the bodywork alone. I’ve broken those numbers down in more detail in my full Capri restoration cost guide, and the Capri Club International classifieds give you a useful price ceiling — once a car needs more in welding than it’d cost to buy a sound one, the maths has tipped.
Where someone is buying a project, my standing advice is: if the eight spots above are all gone, walk away unless the asking price reflects a full restoration ahead of you. The cheap car with bad rust isn’t the bargain it looks. The expensive car with sound bones usually is.
Bring This Checklist When You View
Print this list. Take it with you when you go and look at a Capri. Eight spots, three checks each. If you find rust in three or more of them, factor at least £5,000 of bodywork into your purchase price. If you find rust in six or more, you’re buying a restoration project, not a runabout.
If you want a second opinion before you write a cheque, get the car professionally inspected. Same logic as my pre-MOT rust check guide — paying a specialist for an honest look at a car before you buy it is the cheapest money you’ll ever spend on a classic. If you’re in or near Milton Keynes, I’ll happily look one over for you. Find me through the classic Ford specialists page or message me direct.
Ford Capri Rust — Frequently Asked Questions
Where do Ford Capris rust the most?
The eight worst Ford Capri rust spots are: sills (all three layers), floor pans, scuttle panel under the windscreen, rear wheel arches, A-post bases, boot floor and spare wheel well, chassis rails, and the fuel filler neck plus rear valance. Sills, scuttle and rear arches are the most expensive to put right because they’re structural.
How much does it cost to repair Ford Capri rust?
One or two localised spots — £2,000–£4,000 of bodywork. Most of the eight spots plus a full respray — £8,000–£15,000. A bare-shell rebuild with structural repairs throughout is £12,000–£20,000+. Mechanical work sits on top of those figures.
How do you tell if a Ford Capri has been filled rather than welded?
Run a fridge magnet along sills, arches and lower doors — if it doesn’t stick or pulls away easily, there’s filler. A £30 paint thickness gauge reads over 300 microns where filler has been used (factory paint reads 100–150). Tap the panel: sound steel rings clear, filler thuds dull. And look down the panel in low, raking light — filler ripples show up sideways even when they vanish head-on.
What is the worst rust spot on a Ford Capri?
The sills are the worst. They’re three-layer structural panels that tie the front and rear of the car together — and they’re where most of the body’s rigidity lives. Properly done, both sills with new outer, inner and box section is £2,500–£4,500 in fabrication before paint. Rear arches are a close second because they’re double-skinned and usually rotten on both layers by the time you see it.
Can you buy a Ford Capri that doesn’t rust?
No. Every Capri left the factory with minimal rust-proofing and all of them are 40+ years old now. What you can find is either a well-repaired Capri (rust cut out, new steel welded in, properly protected) or a not-yet-repaired Capri (honest, visible rust the seller isn’t hiding). What you want to avoid is a Capri where rust has been hidden under filler or fresh paint to get it sold.
You don’t buy a Capri on the colour, the wheels, or the paint. You buy it on what’s behind the paint. Get that wrong and nothing else matters.