Suzuki
GS500F
Cafe Racer
In Memory of John Fraser Cox · Full Custom Build · MOT'd & Road Legal
My dad's Suzuki GS500F had been sitting in his shed for years. After he passed away, I pulled it out, pointed a camera at it, and started building a cafe racer in his memory. Every detail on this bike means something – from the wood side panels to the veneer on the tank. It was my first ever YouTube video, and it's the build I'm most proud of. Built at my workshop near Milton Keynes, ridden with a grin ever since.
In Memory
of Dad
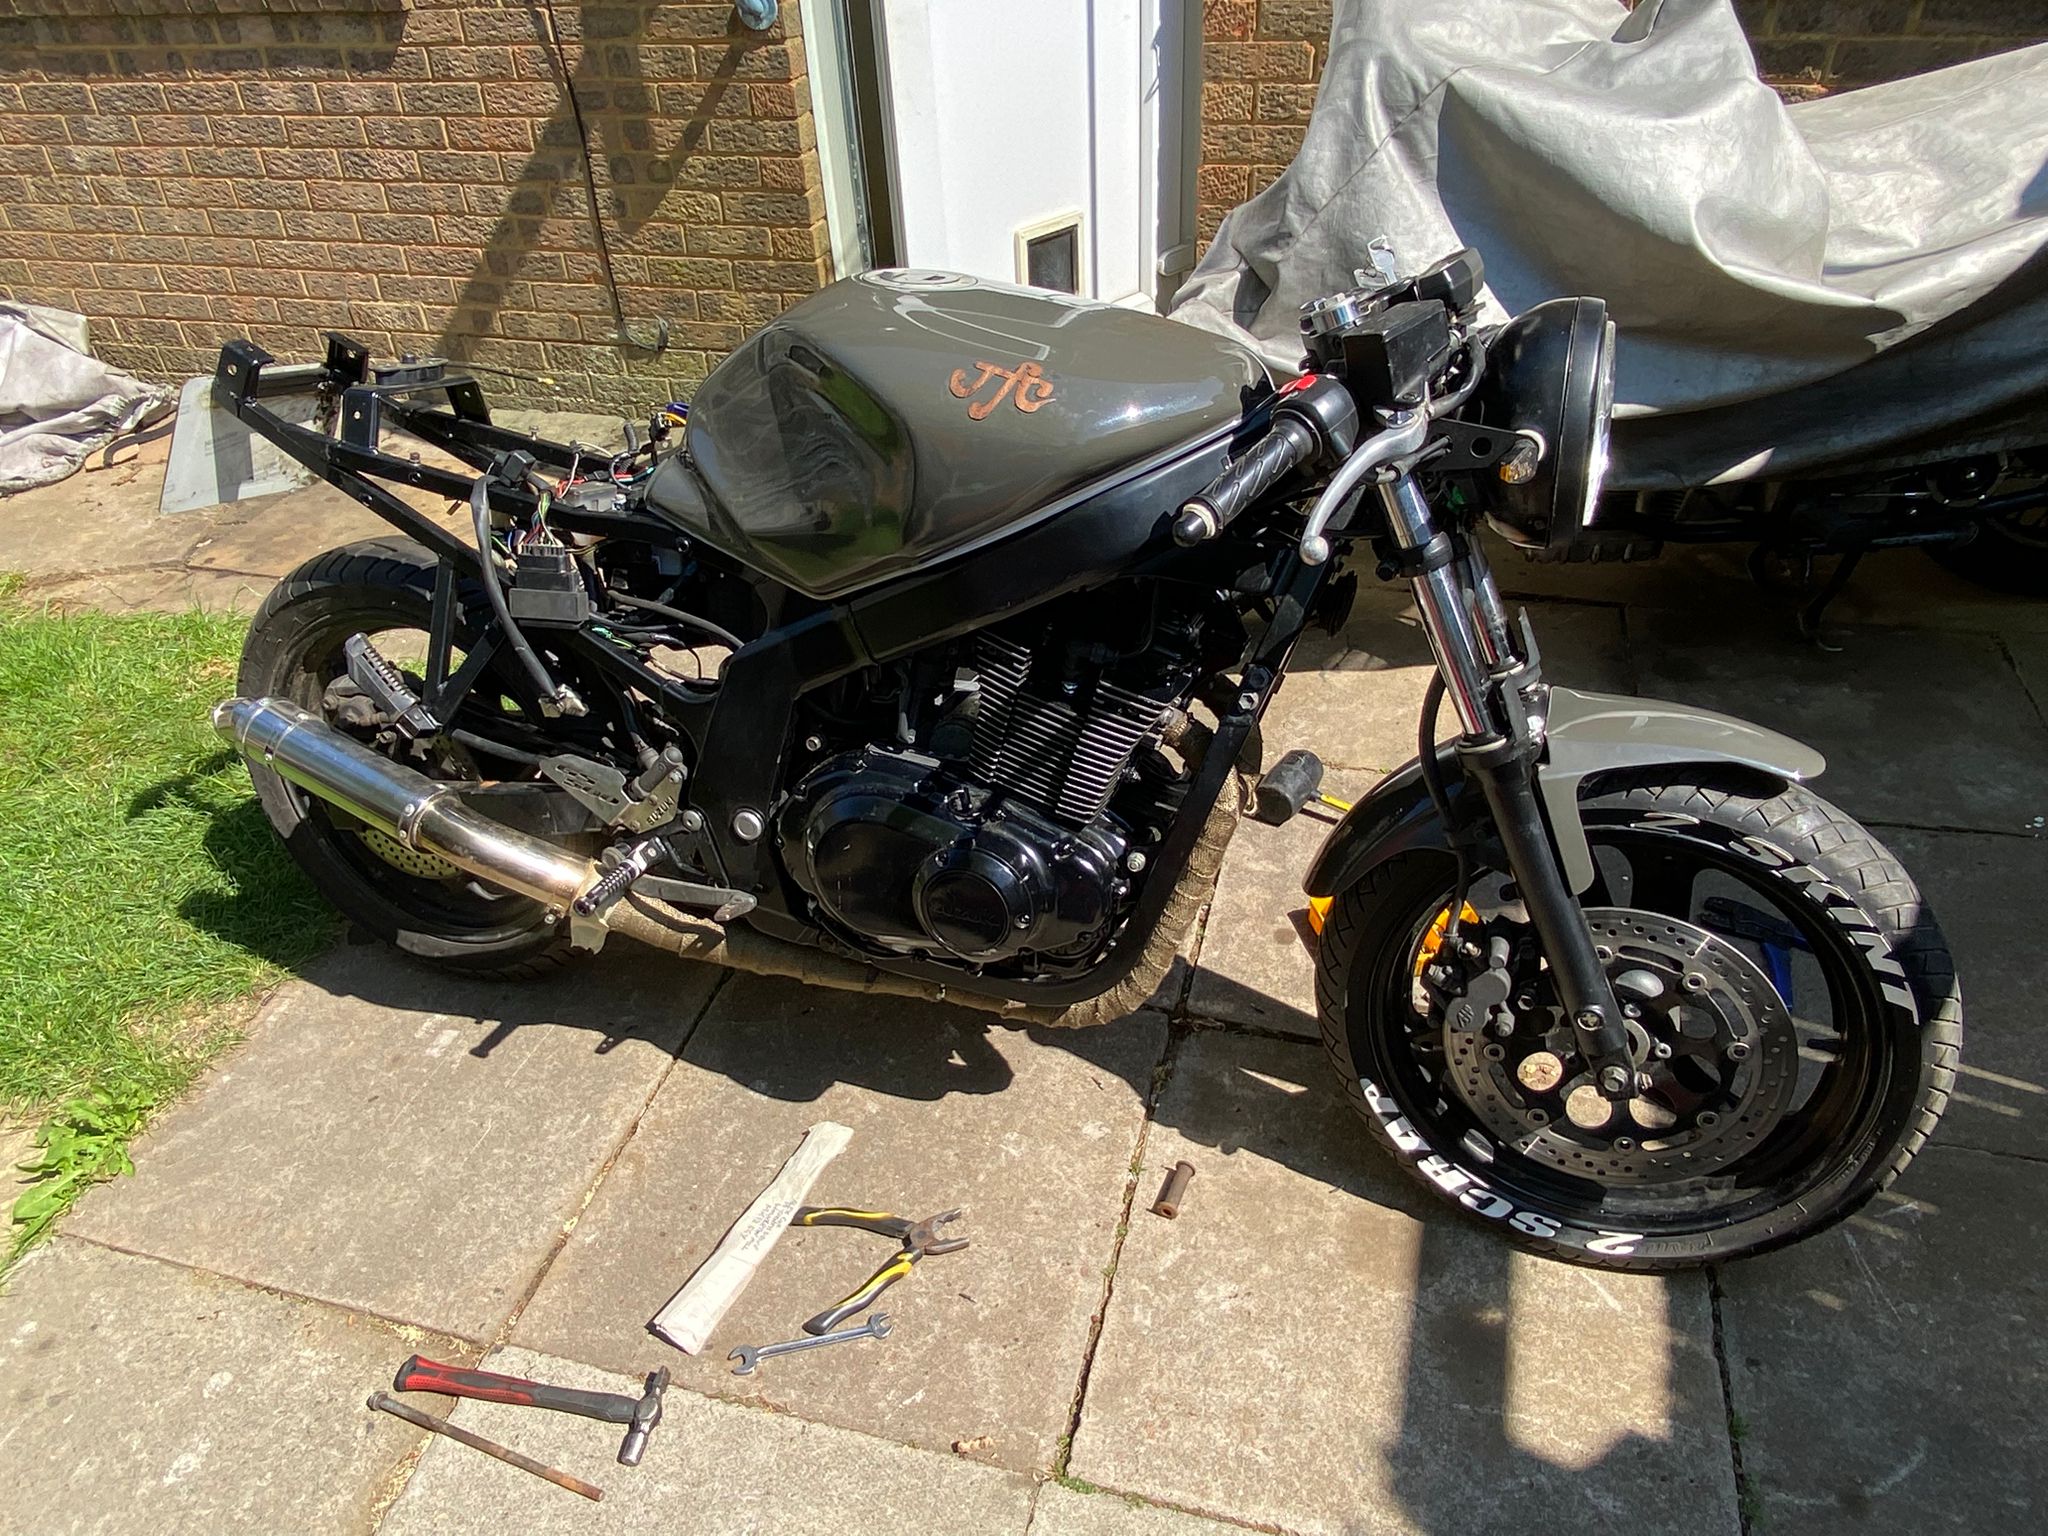
What I Started With
- Suzuki GS500F pulled from my dad's shed – hadn't moved in years
- Bypassed the starter relay and she fired up – or so I thought
- Exhaust manifold bolts all snapped due to poor design
- Rust found on the frame once the strip-down began
- A vision for something completely custom – and deeply personal
My dad, John Fraser Cox, was a woodworker. After he passed, his bike just sat in the shed collecting dust. I knew I had to do something with it – something that meant something. So I dragged the GS500 out, bypassed the starter relay, and she fired straight up. Or so I thought.
"This wasn't just a bike build. Every detail – the wood, the veneer, the beeswax – it all comes back to my dad. It's the build I'm most proud of."
What started as "get it running and tidy it up" turned into a full ground-up cafe racer build. I stripped everything, modified the frame, fabricated panels from scratch, and put my dad's mark on every part of it. The whole thing was filmed for my 2 Skint 2 Scrap YouTube channel – my first ever video. Just me, his bike, and an idea.
It took longer than I planned. It always does. But it passed its MOT, it rides beautifully, and it's ready for smiles per gallon for the rest of my life.
Step by Step
Pulling It Apart
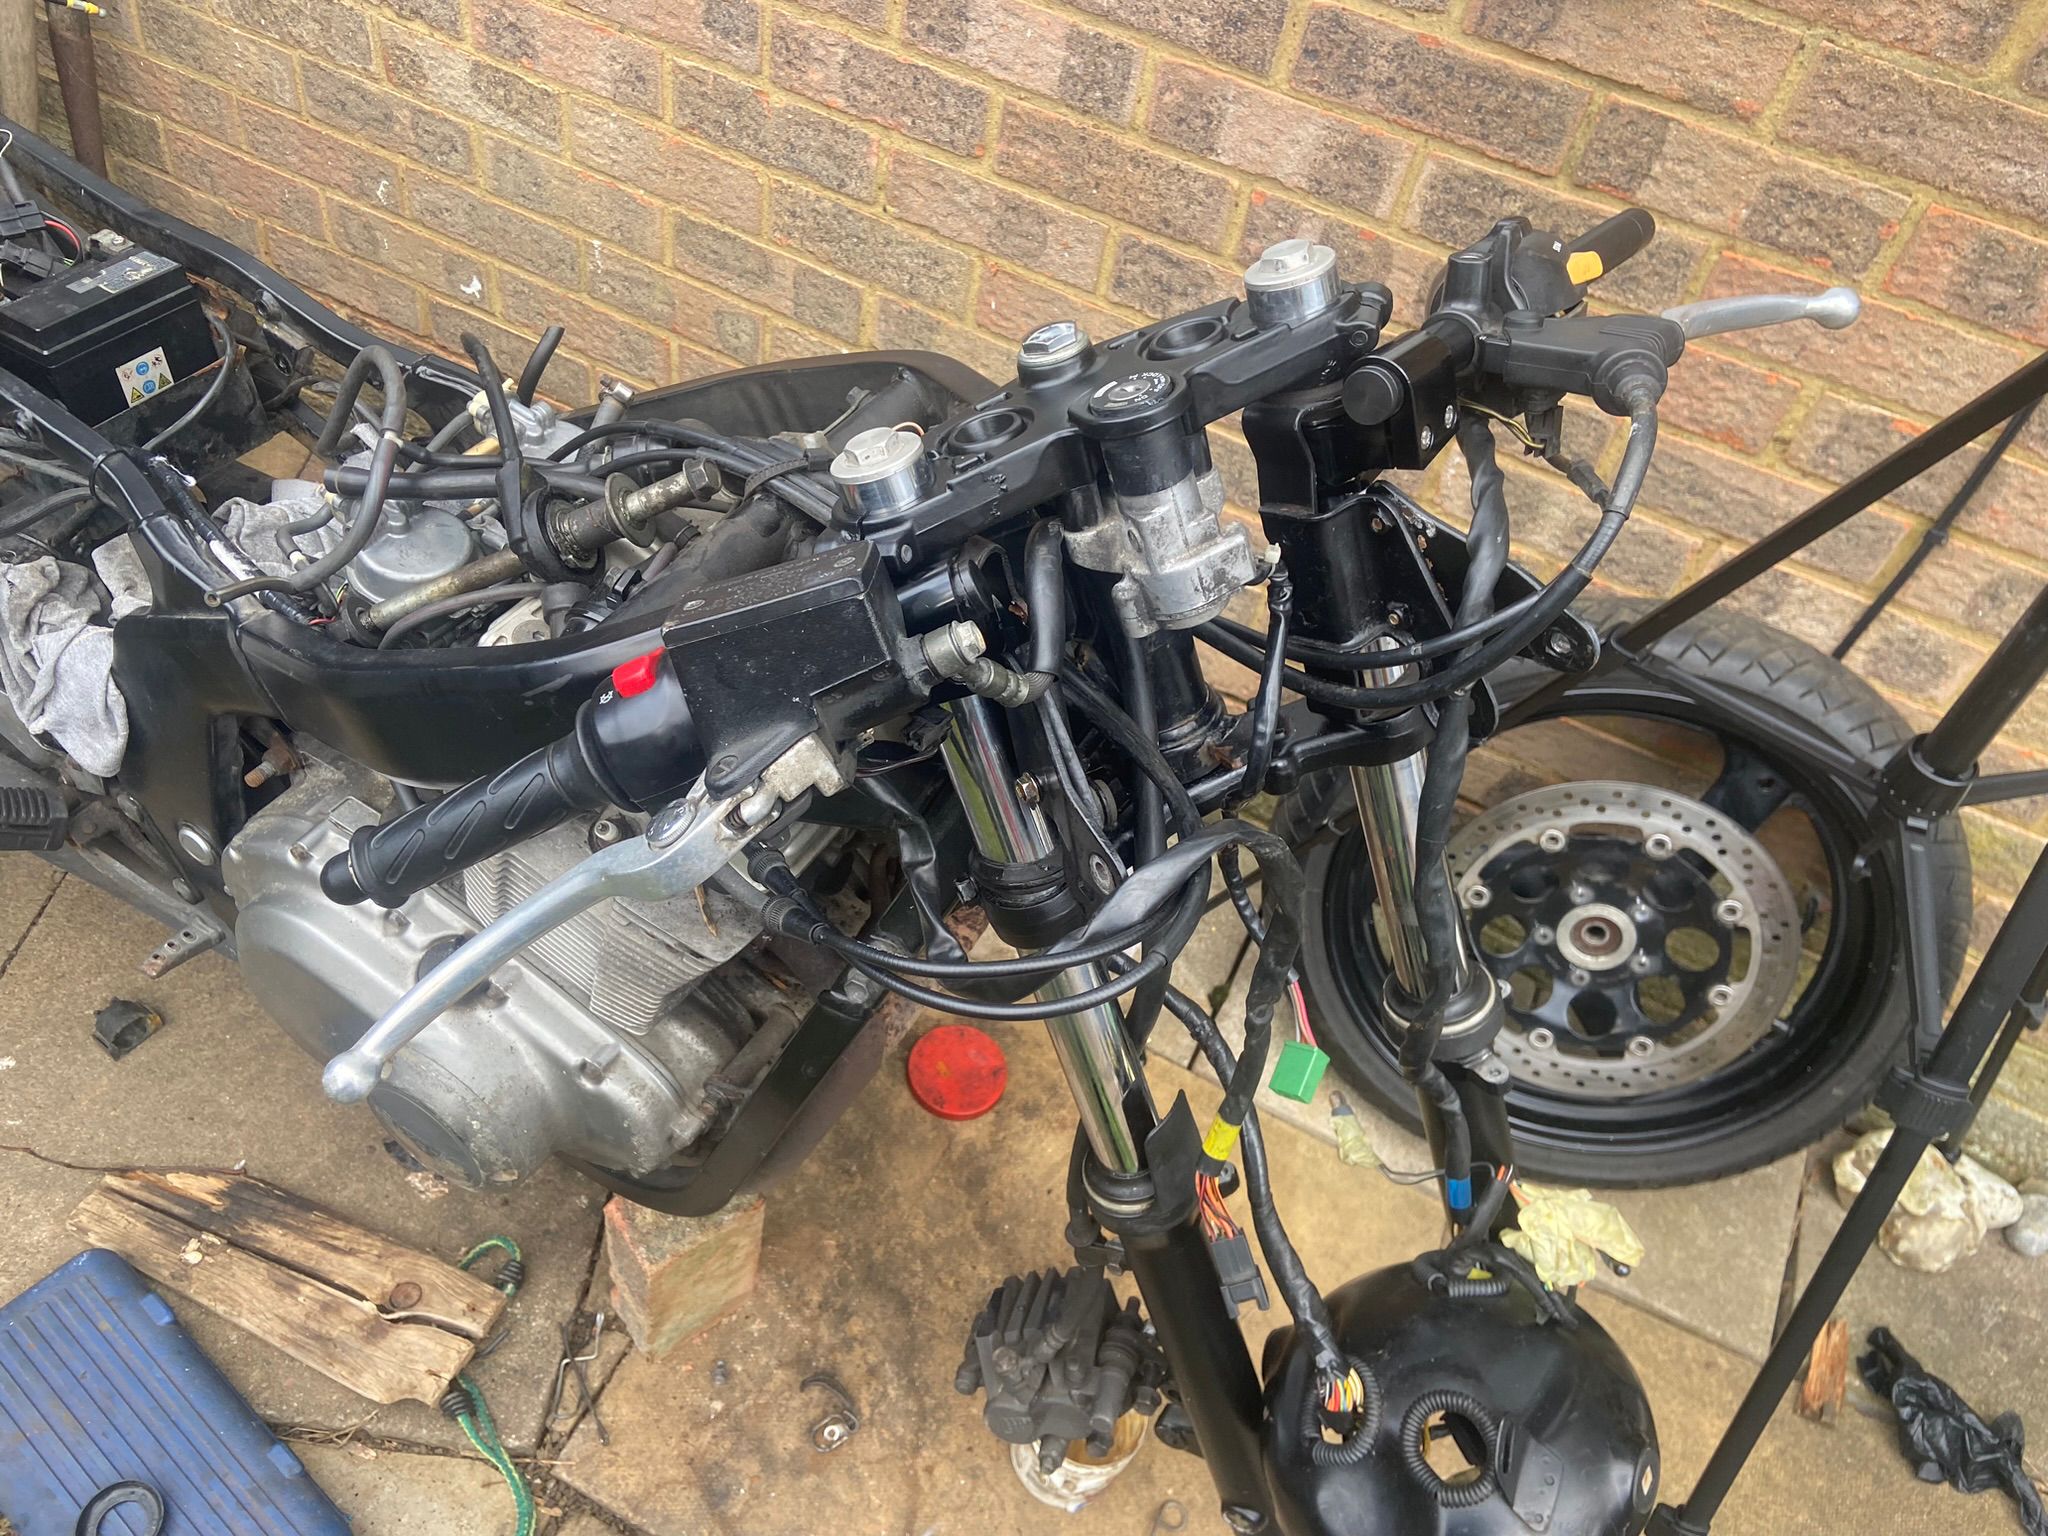
After getting the bike out of my dad's shed and confirming it ran, the build could begin. I pulled the front end apart and everything that was silver got painted black – front forks, headlight ring, and a few other brackets. I made a bracket to fit the aftermarket digital clocks, and when the handlebars that clamped to the fork legs went on, I realised the original headlight bracket wouldn't work – so aftermarket headlight brackets went on too.
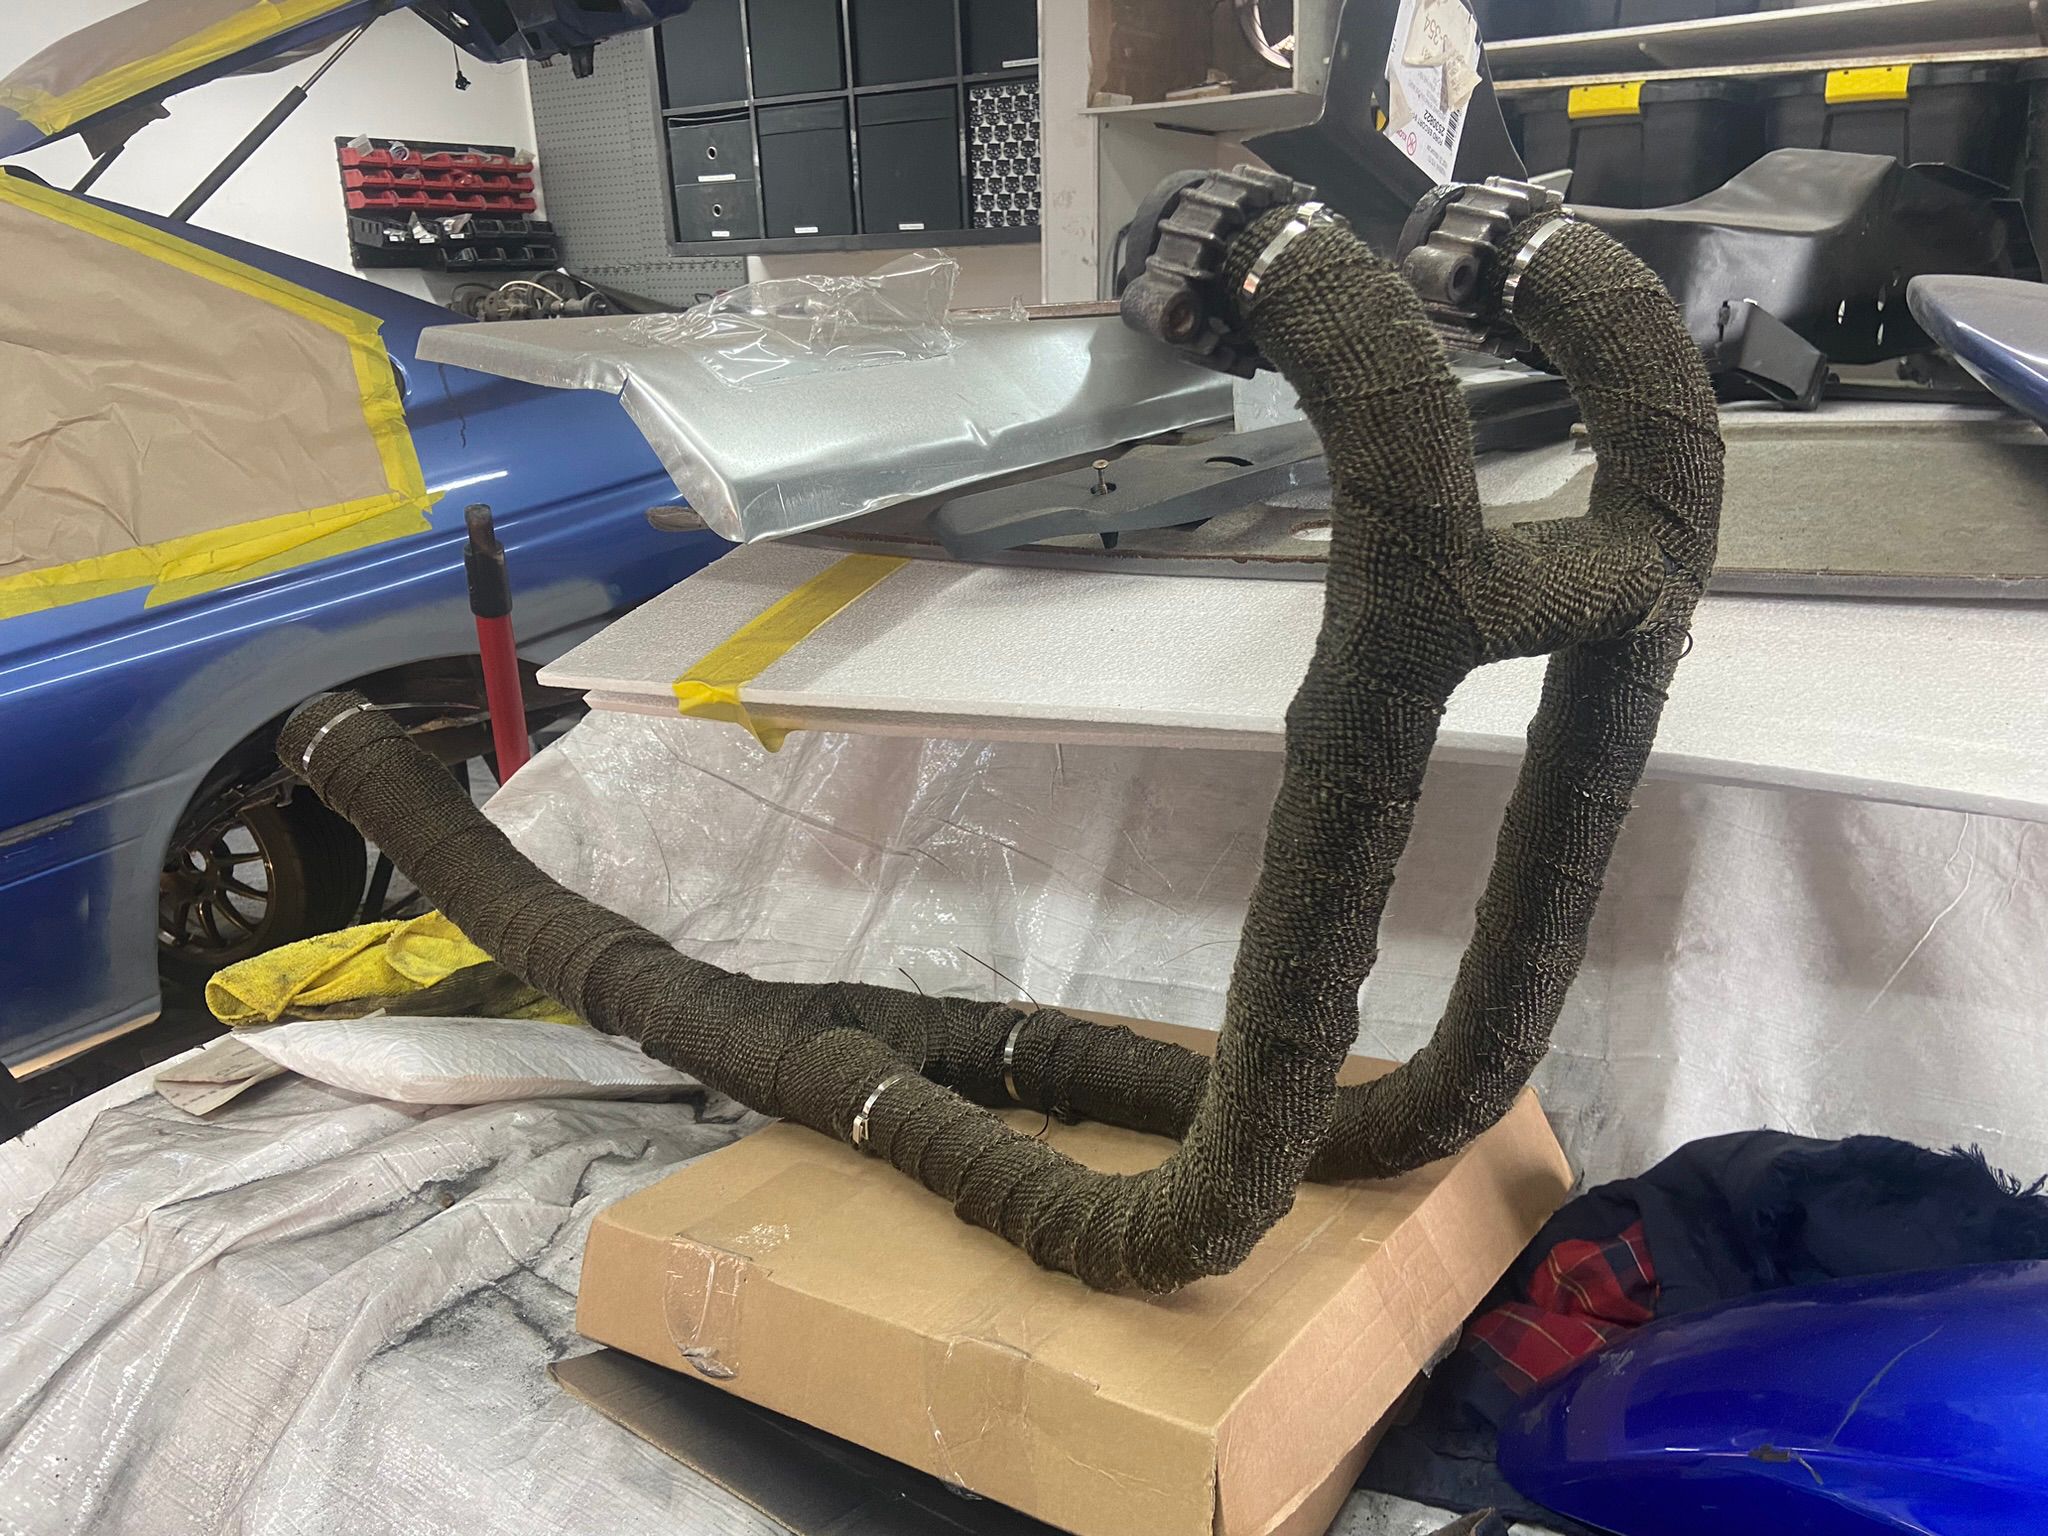
Snapped Bolts & Escalation
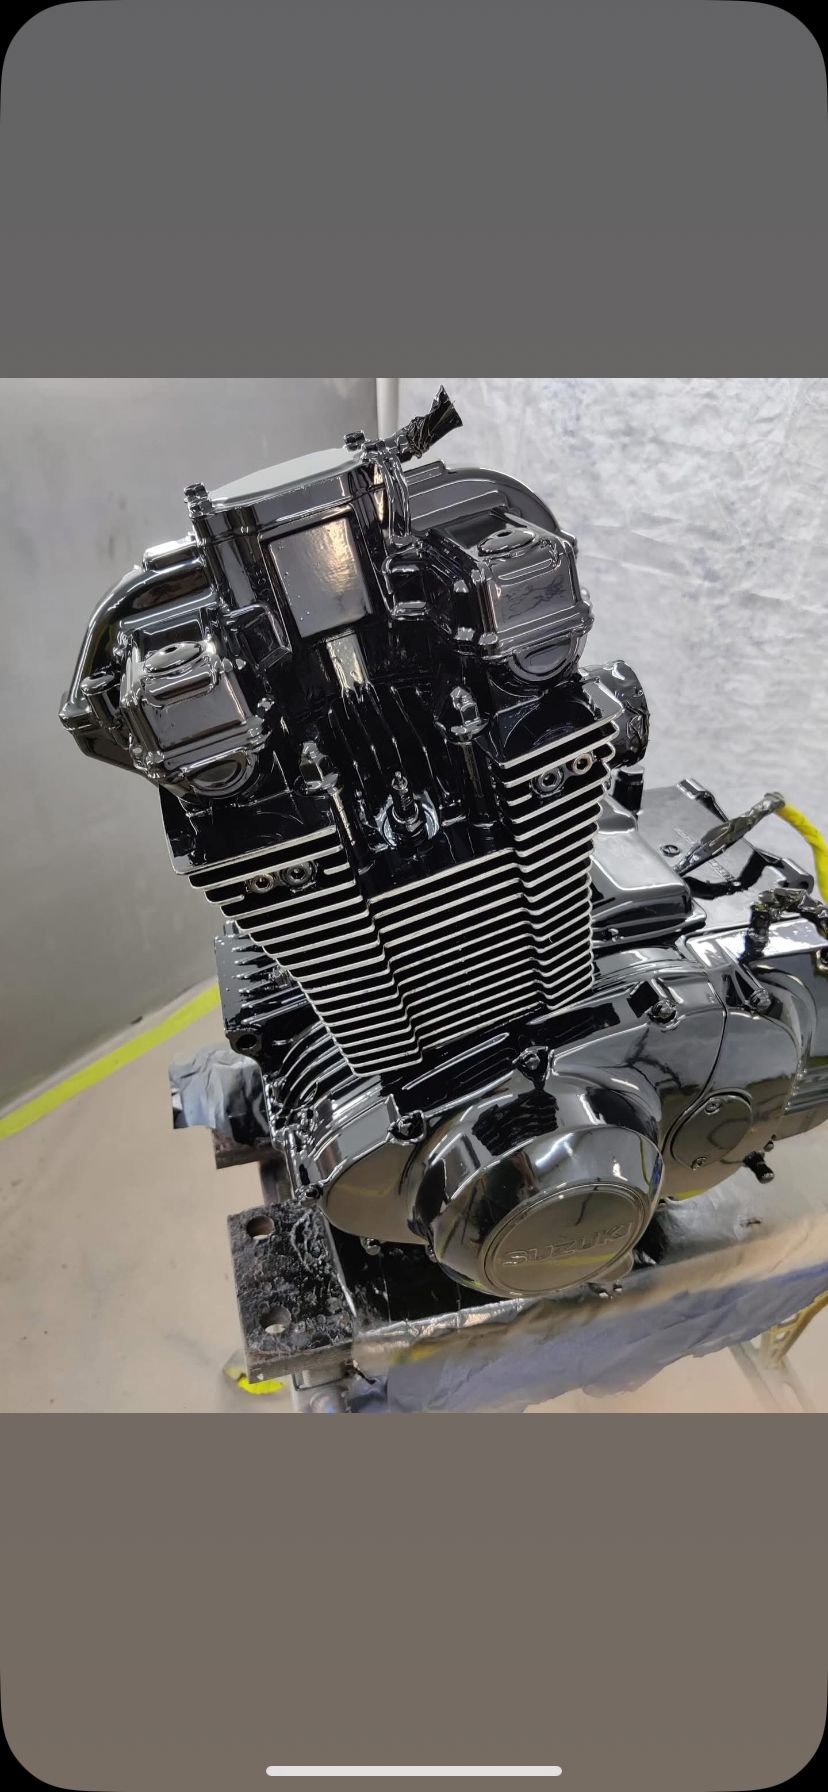
I was going to paint the engine and frame together, but when I went to remove the exhaust I snapped all the manifold bolts – poor design from factory. The engine had to come out so the bolts could be drilled out and helicoiled by my local engine shop, Headline MK, just down the road in Milton Keynes. That's when things escalated. I found rust on the frame, so what was meant to be a quick paint job turned into a full strip-down and rebuild.
Repair, Modify & Powder Coat
I repaired the rust on the frame and then modified it to accept the new rear seat design I had in mind – the same kind of welding and fabrication work I do for customers at the workshop. The frame and swingarm were sent off to Colourtone, a local powder coaters near Buckingham, – came back looking brand new. With the frame sorted, the engine got a fresh coat of gloss black paint too. Everything was starting to come together.
The Seat Hump & Upholstery
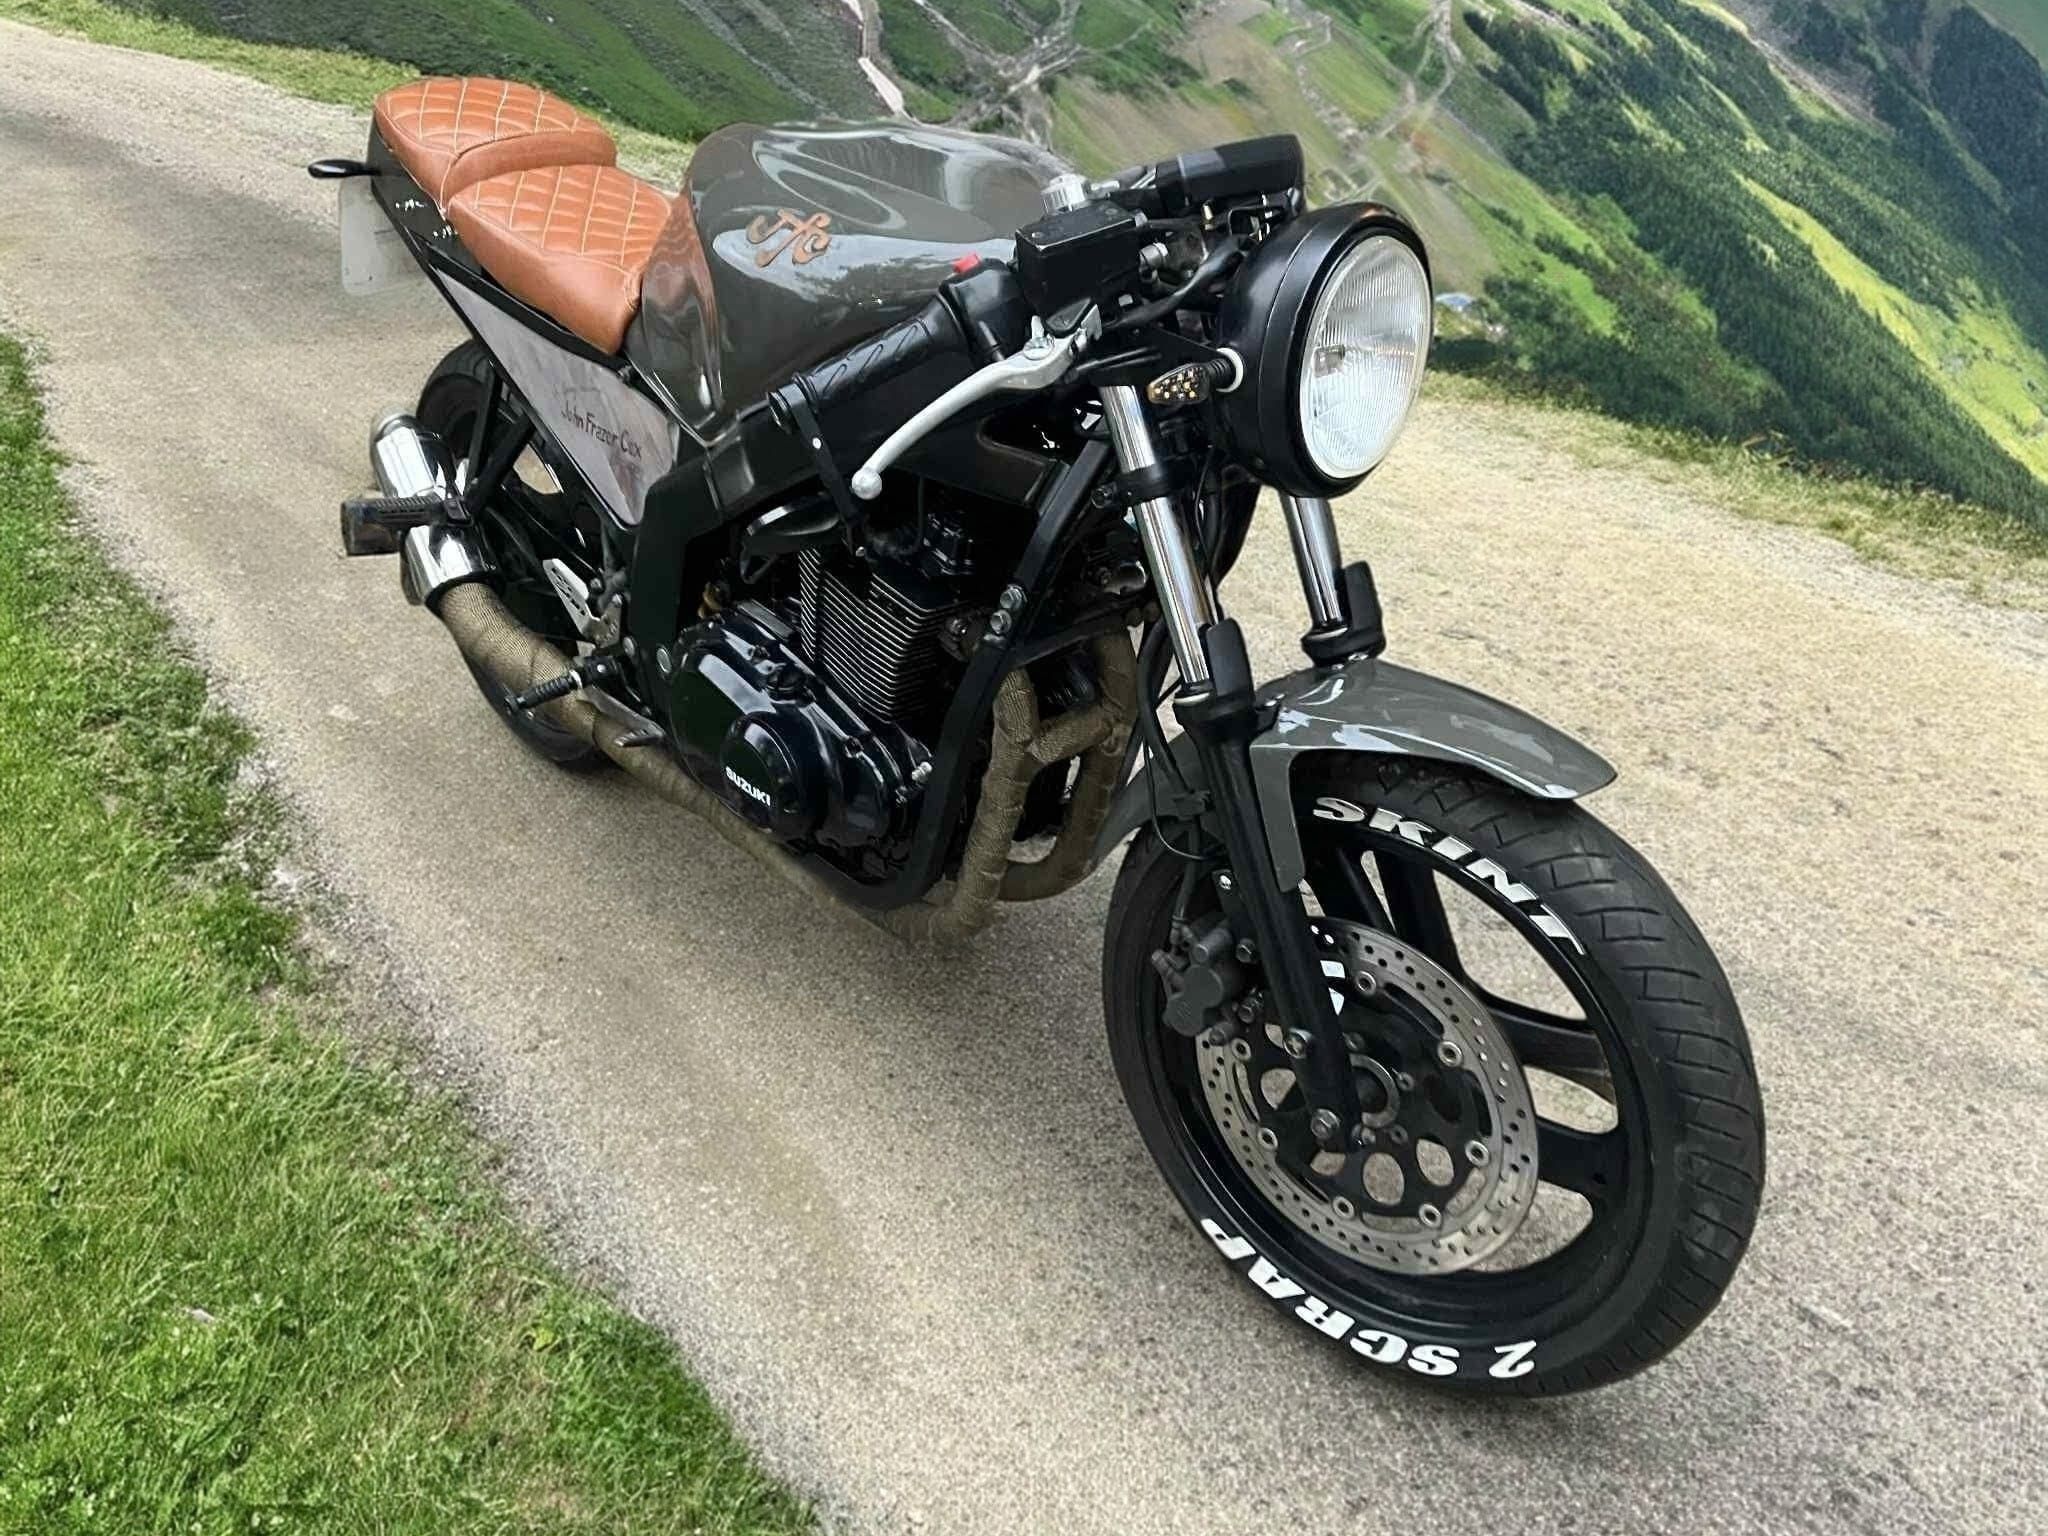
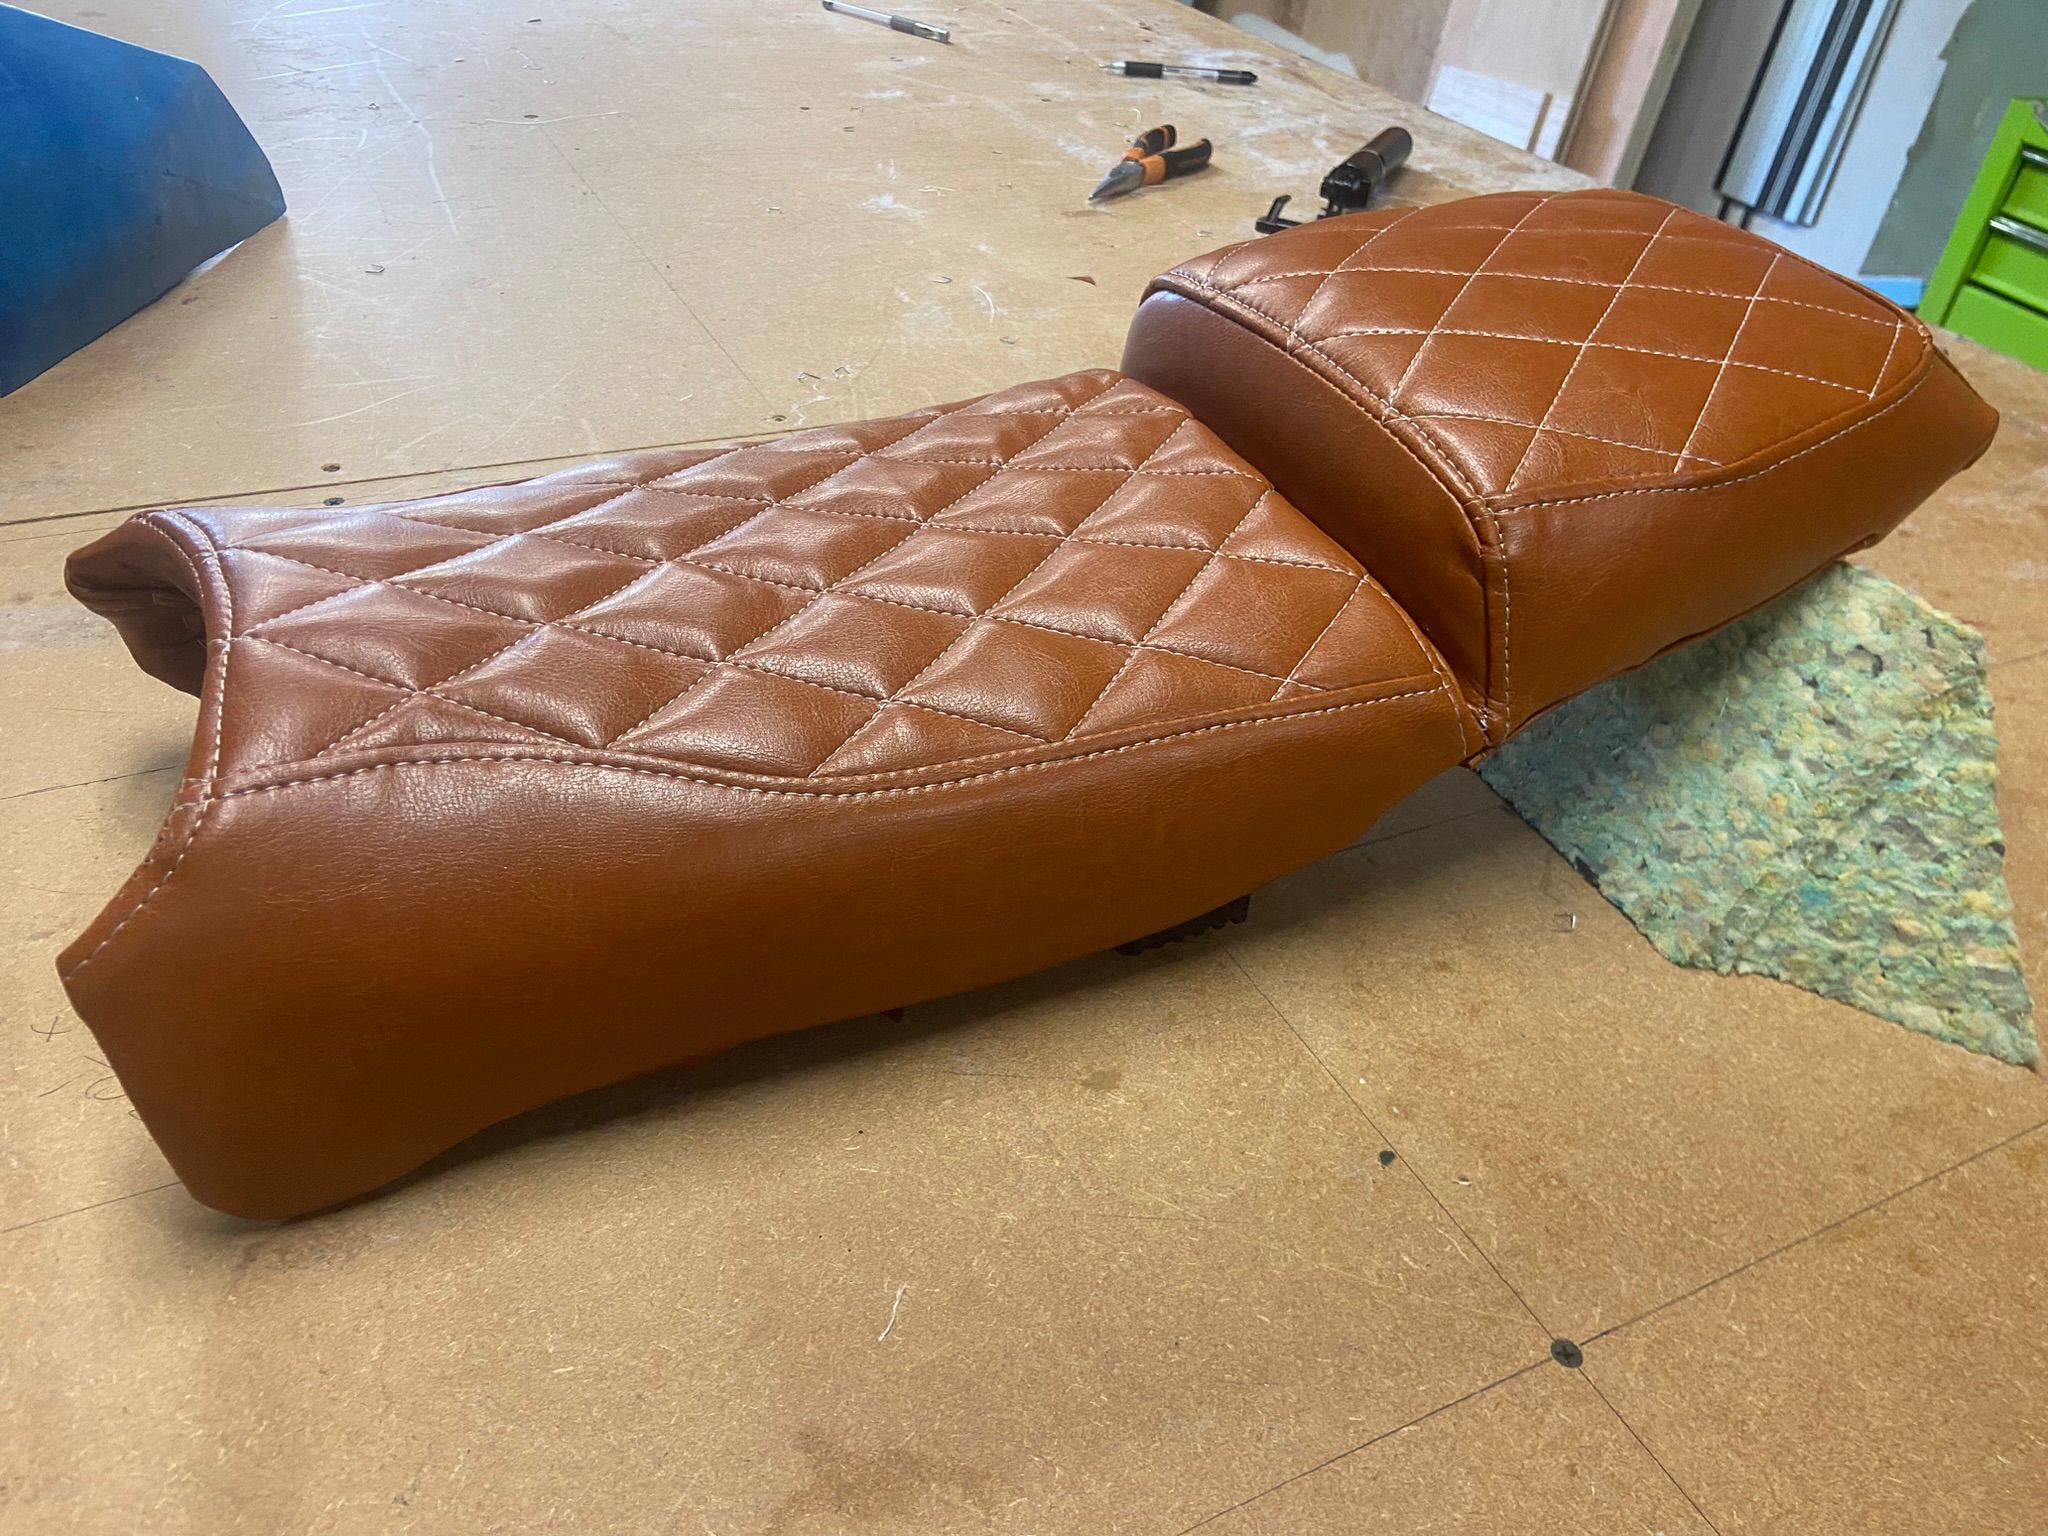
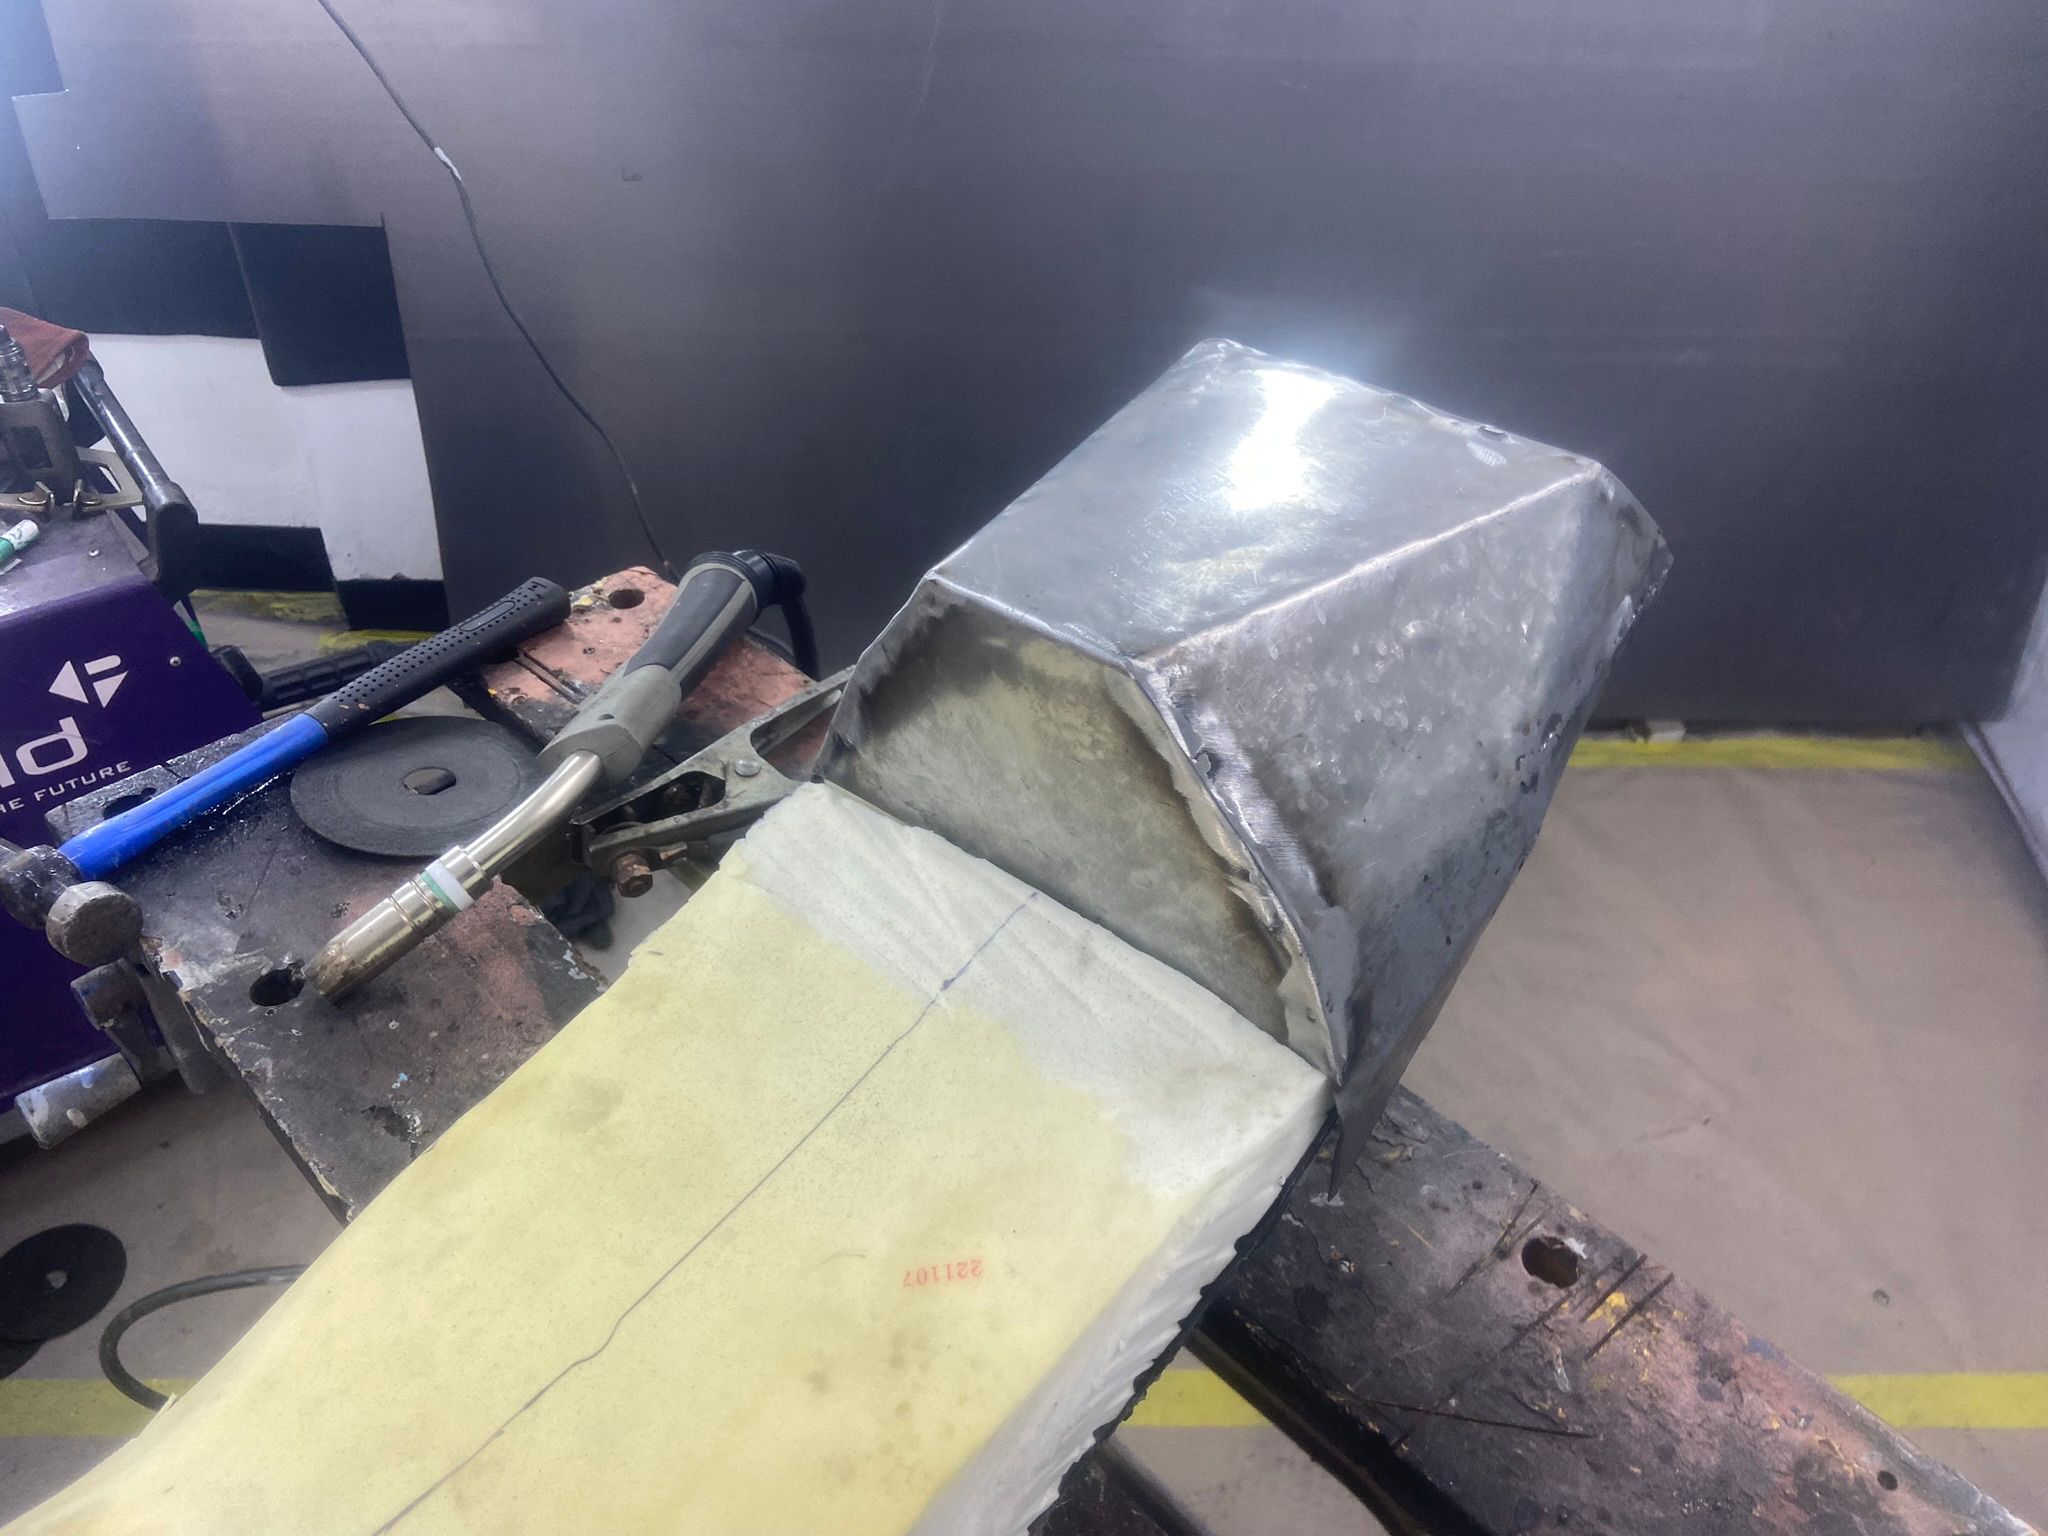
I built the rear seat hump completely from scratch – starting with "CAD" (cardboard aided design) and then making it from sheet metal. The first design wasn't quite right once it was painted, so I went back to the drawing board and completely redesigned it. For the seat itself, I went to see a mate who runs an upholstery company and together we made the diamond-quilted tan leather design I'd had in my head. It came out exactly how I'd imagined.
Panels, Shock & Finishing Touches
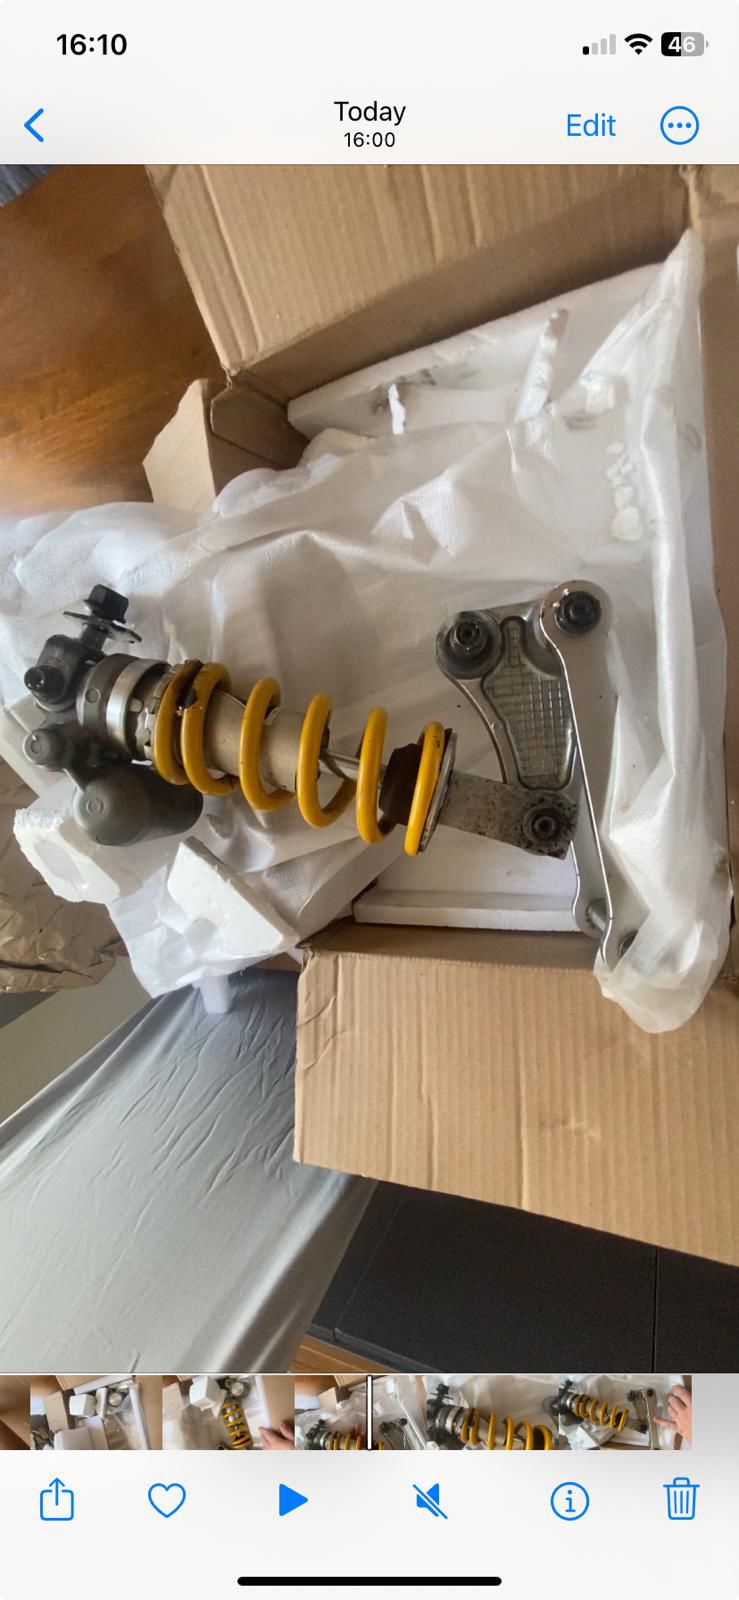
I modified the front mudguard and painted that along with the other panels in an industry standard RAL colour – the same custom respray process I use on cars. After some research, I upgraded the rear shock to an uprated one from a Yamaha R6 – fairly easy mod but it gives a great pop of colour from under the seat. To promote the YouTube channel, I invested in tyre lettering – white "2 Skint 2 Scrap" to give that sport and custom look.
Wood, Veneer & Beeswax
This was the most important part of the build. My dad was a woodworker, so wood had to feature. I found some beautiful veneer to create his "logo" and replaced the Suzuki badge on the tank with it – a permanent mark of who this bike was built for. For the side panels, my brother broke down an old wardrobe and found a beautiful slab of pine. I cut them to shape, burned my dad's tribute into the wood with a soldering iron, and stained them in a light grey.
To seal them, I needed something that meant something. A friend keeps bees and gave me some unrefined beeswax – and beeswax was the only wax my dad would ever use. I researched and made my own finish from that and classic car engine oil, which felt fitting. They came out amazing.
Carbs, Dave Wood Racing & MOT
After putting the whole bike together and thinking it was finished, I just couldn't get it running. No matter what I tried. I taught myself how carbs worked, replaced jets, adjusted the needles – but to no avail. In the end it went off to Dave Wood Racing, where it got the love it needed. It came home a fully running and riding bike, flew through its MOT, and is now ready for smiles per gallon for the rest of my life.
Photography

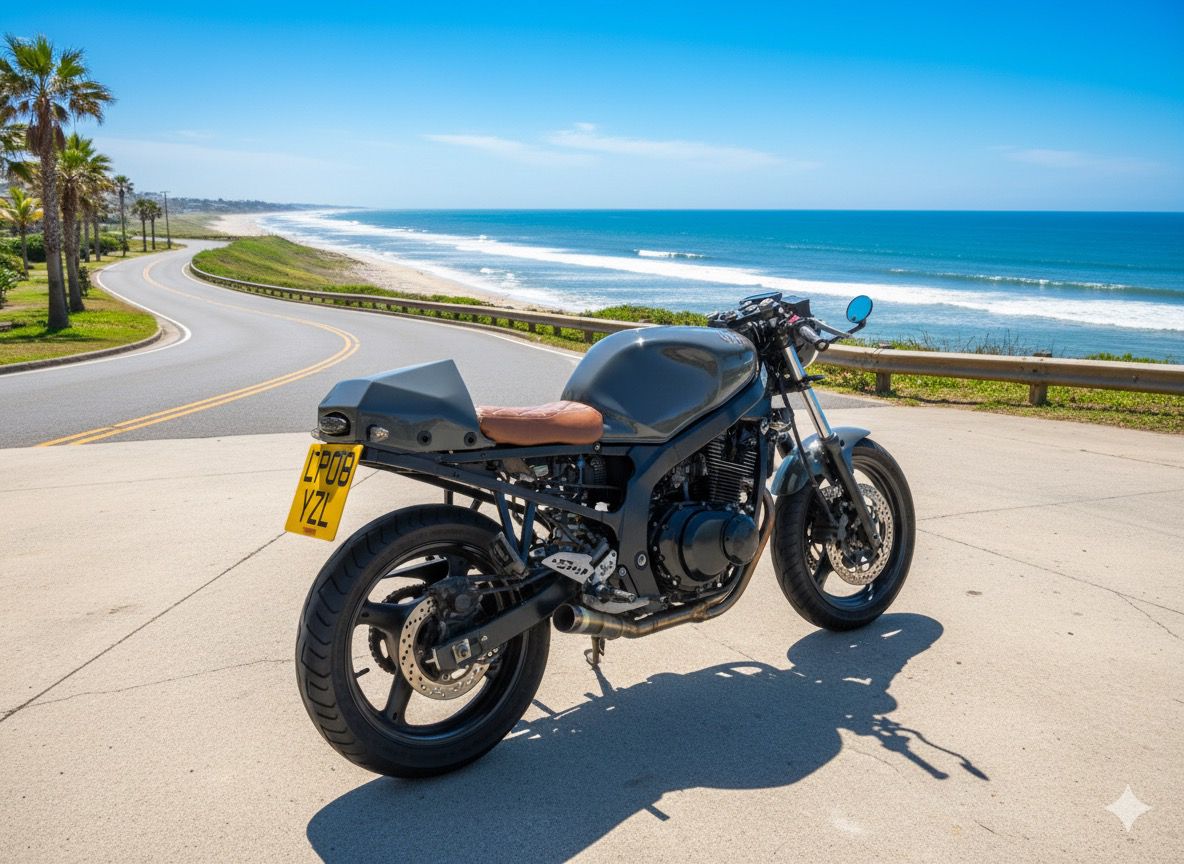
The Finished Bike
A Proper Tribute
Every detail on this bike connects back to my dad. The veneer on the tank replacing the Suzuki badge. The wooden side panels cut from a reclaimed wardrobe. The beeswax finish he'd have used himself. It's not just a bike – it's a piece of him.
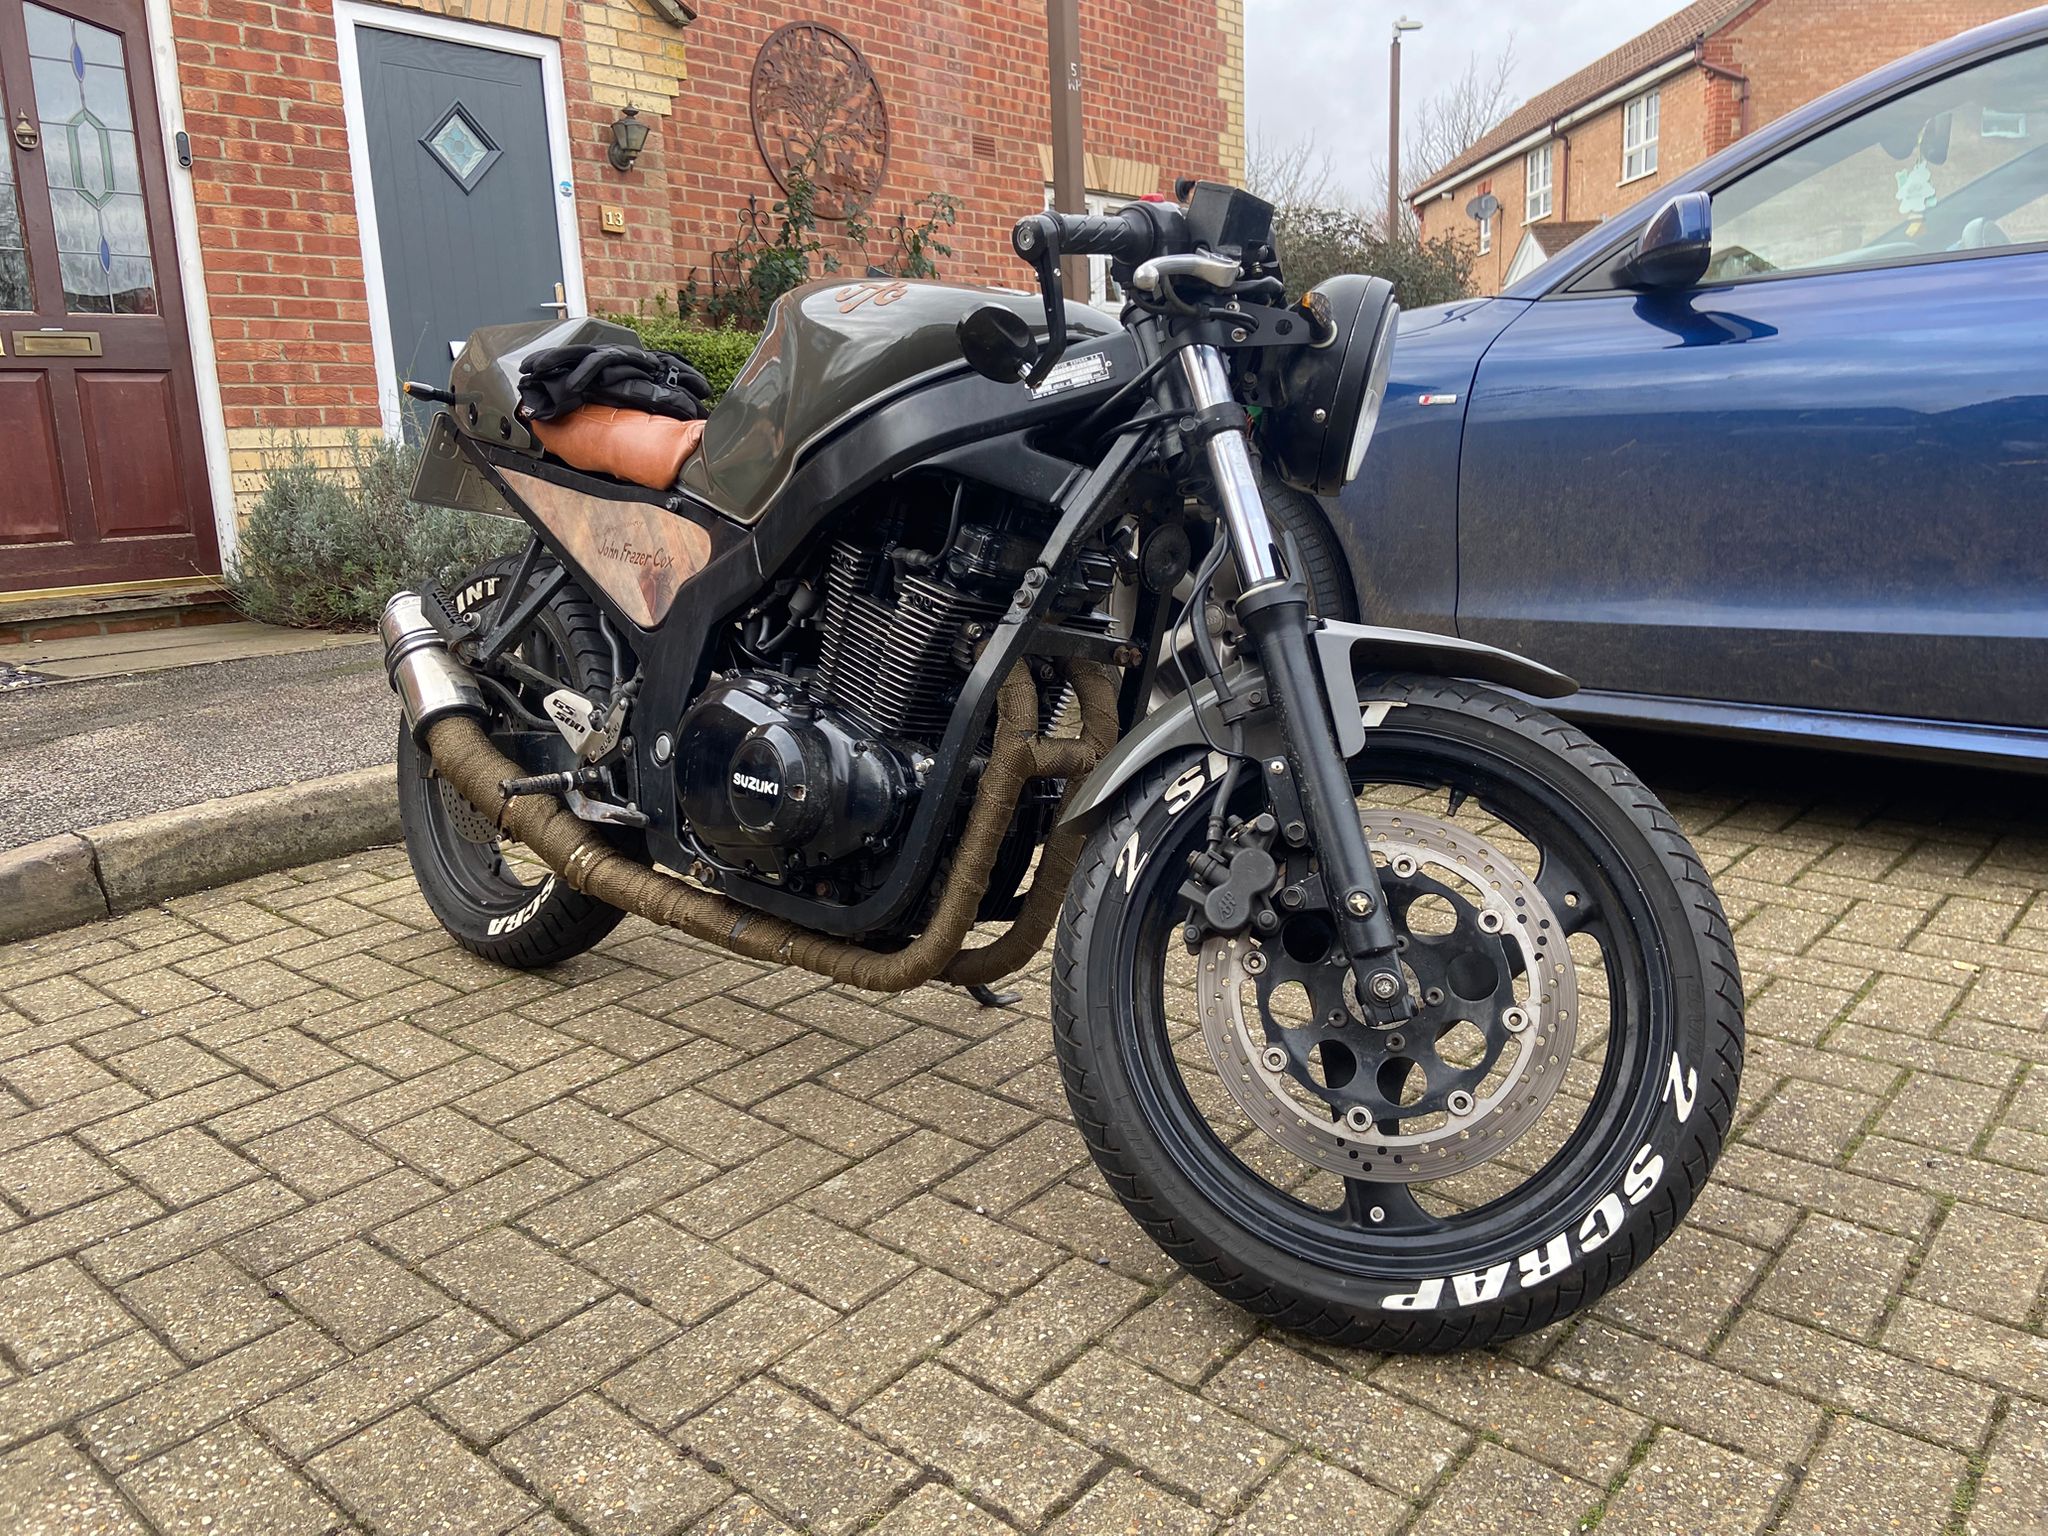
MOT'd & Road Legal
After the carb drama and a trip to Dave Wood Racing, the bike came home running properly. Flew through its MOT first time. It's not sitting in a garage under a cover – it gets ridden, which is exactly the point.
Where It All Started
This bike was the reason the 2 Skint 2 Scrap YouTube channel exists. My first ever video. Just me, my dad's bike, and an idea. Everything that followed – the Escort GTI build, the channel, the workshop content – started here.
The Full Series
on YouTube
This is where it all started. Every step of the GS500F cafe racer build was filmed for the 2 Skint 2 Scrap channel – from dragging it out of my dad's shed to that first ride after the MOT. Watch the whole playlist and see exactly how it came together, the problems I hit along the way, and why this build means so much to me.
Watch the Full PlaylistBuild
Details
Got a Bike or Car
That Deserves Better?
Whether it's a full restoration, a custom respray, or some welding and fabrication – I work on bikes and cars at my workshop near Milton Keynes. Customers come from across Buckingham, Towcester, and Northampton. If it means something to you, it means something to me. Send me some photos on WhatsApp and I'll tell you straight what's involved.